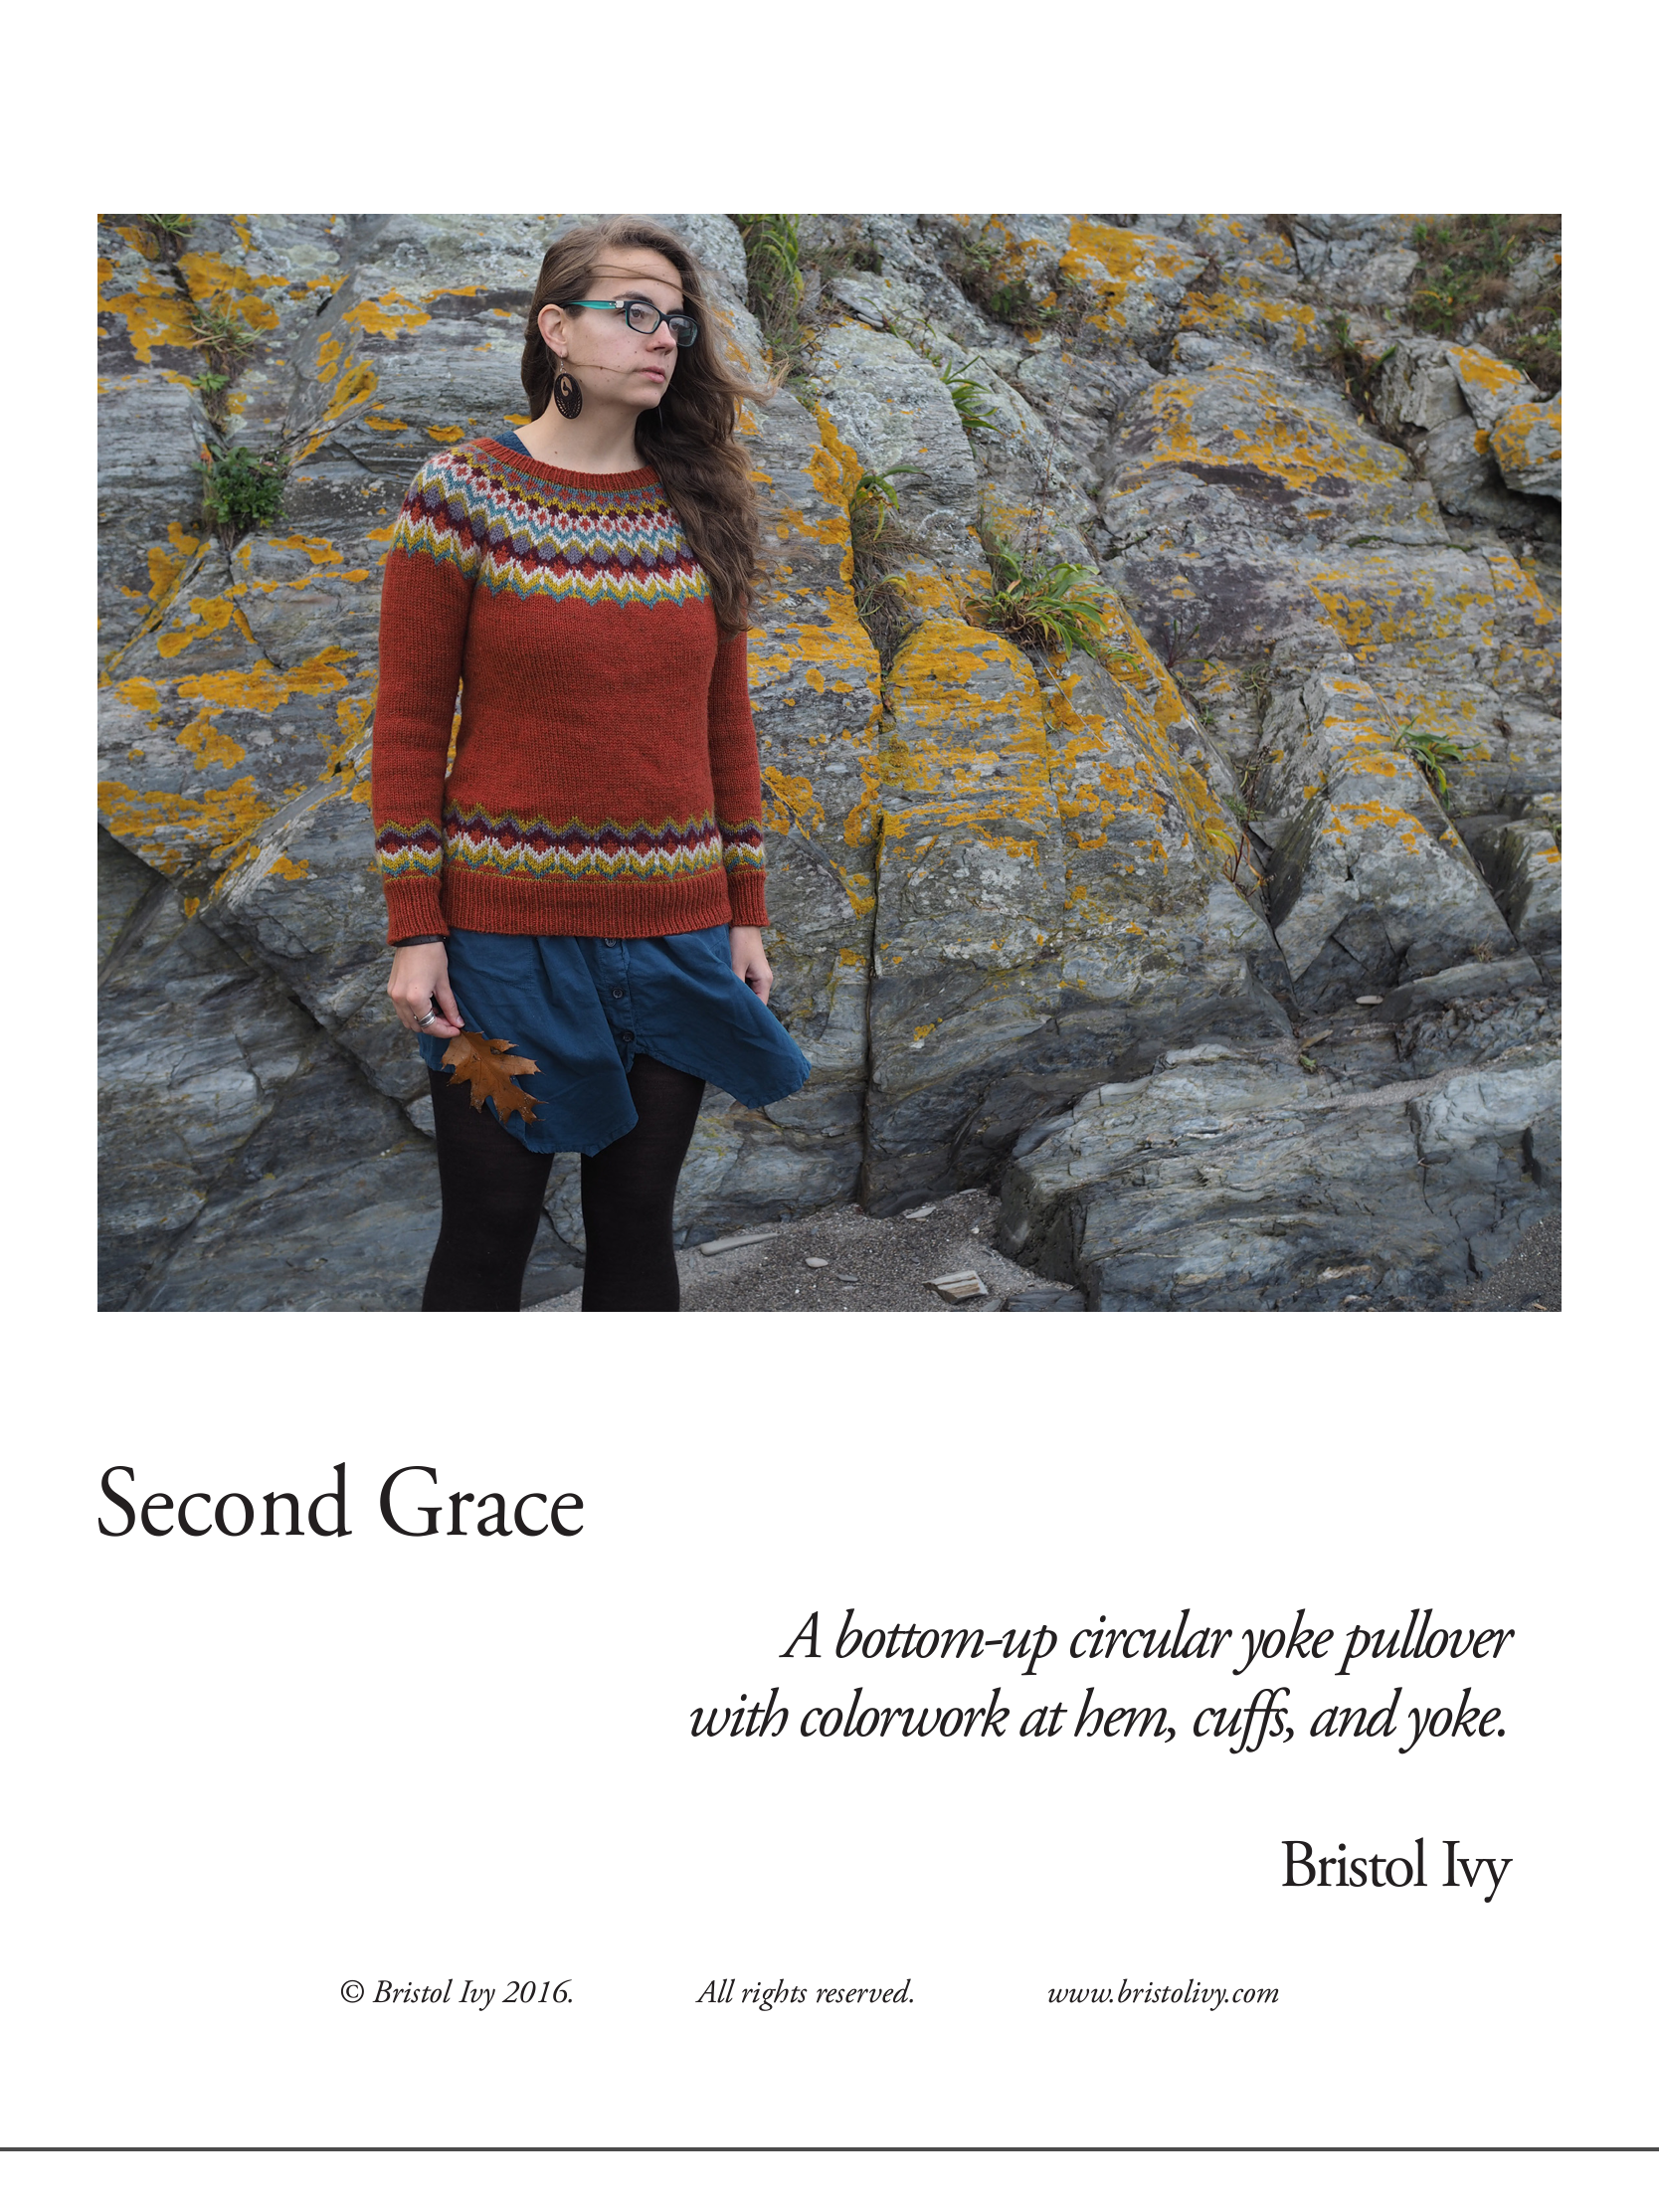
Second Grace: My Slow Fashion Sweater Journey
The Yarn I Couldn’t Resist (and the Town I Love)
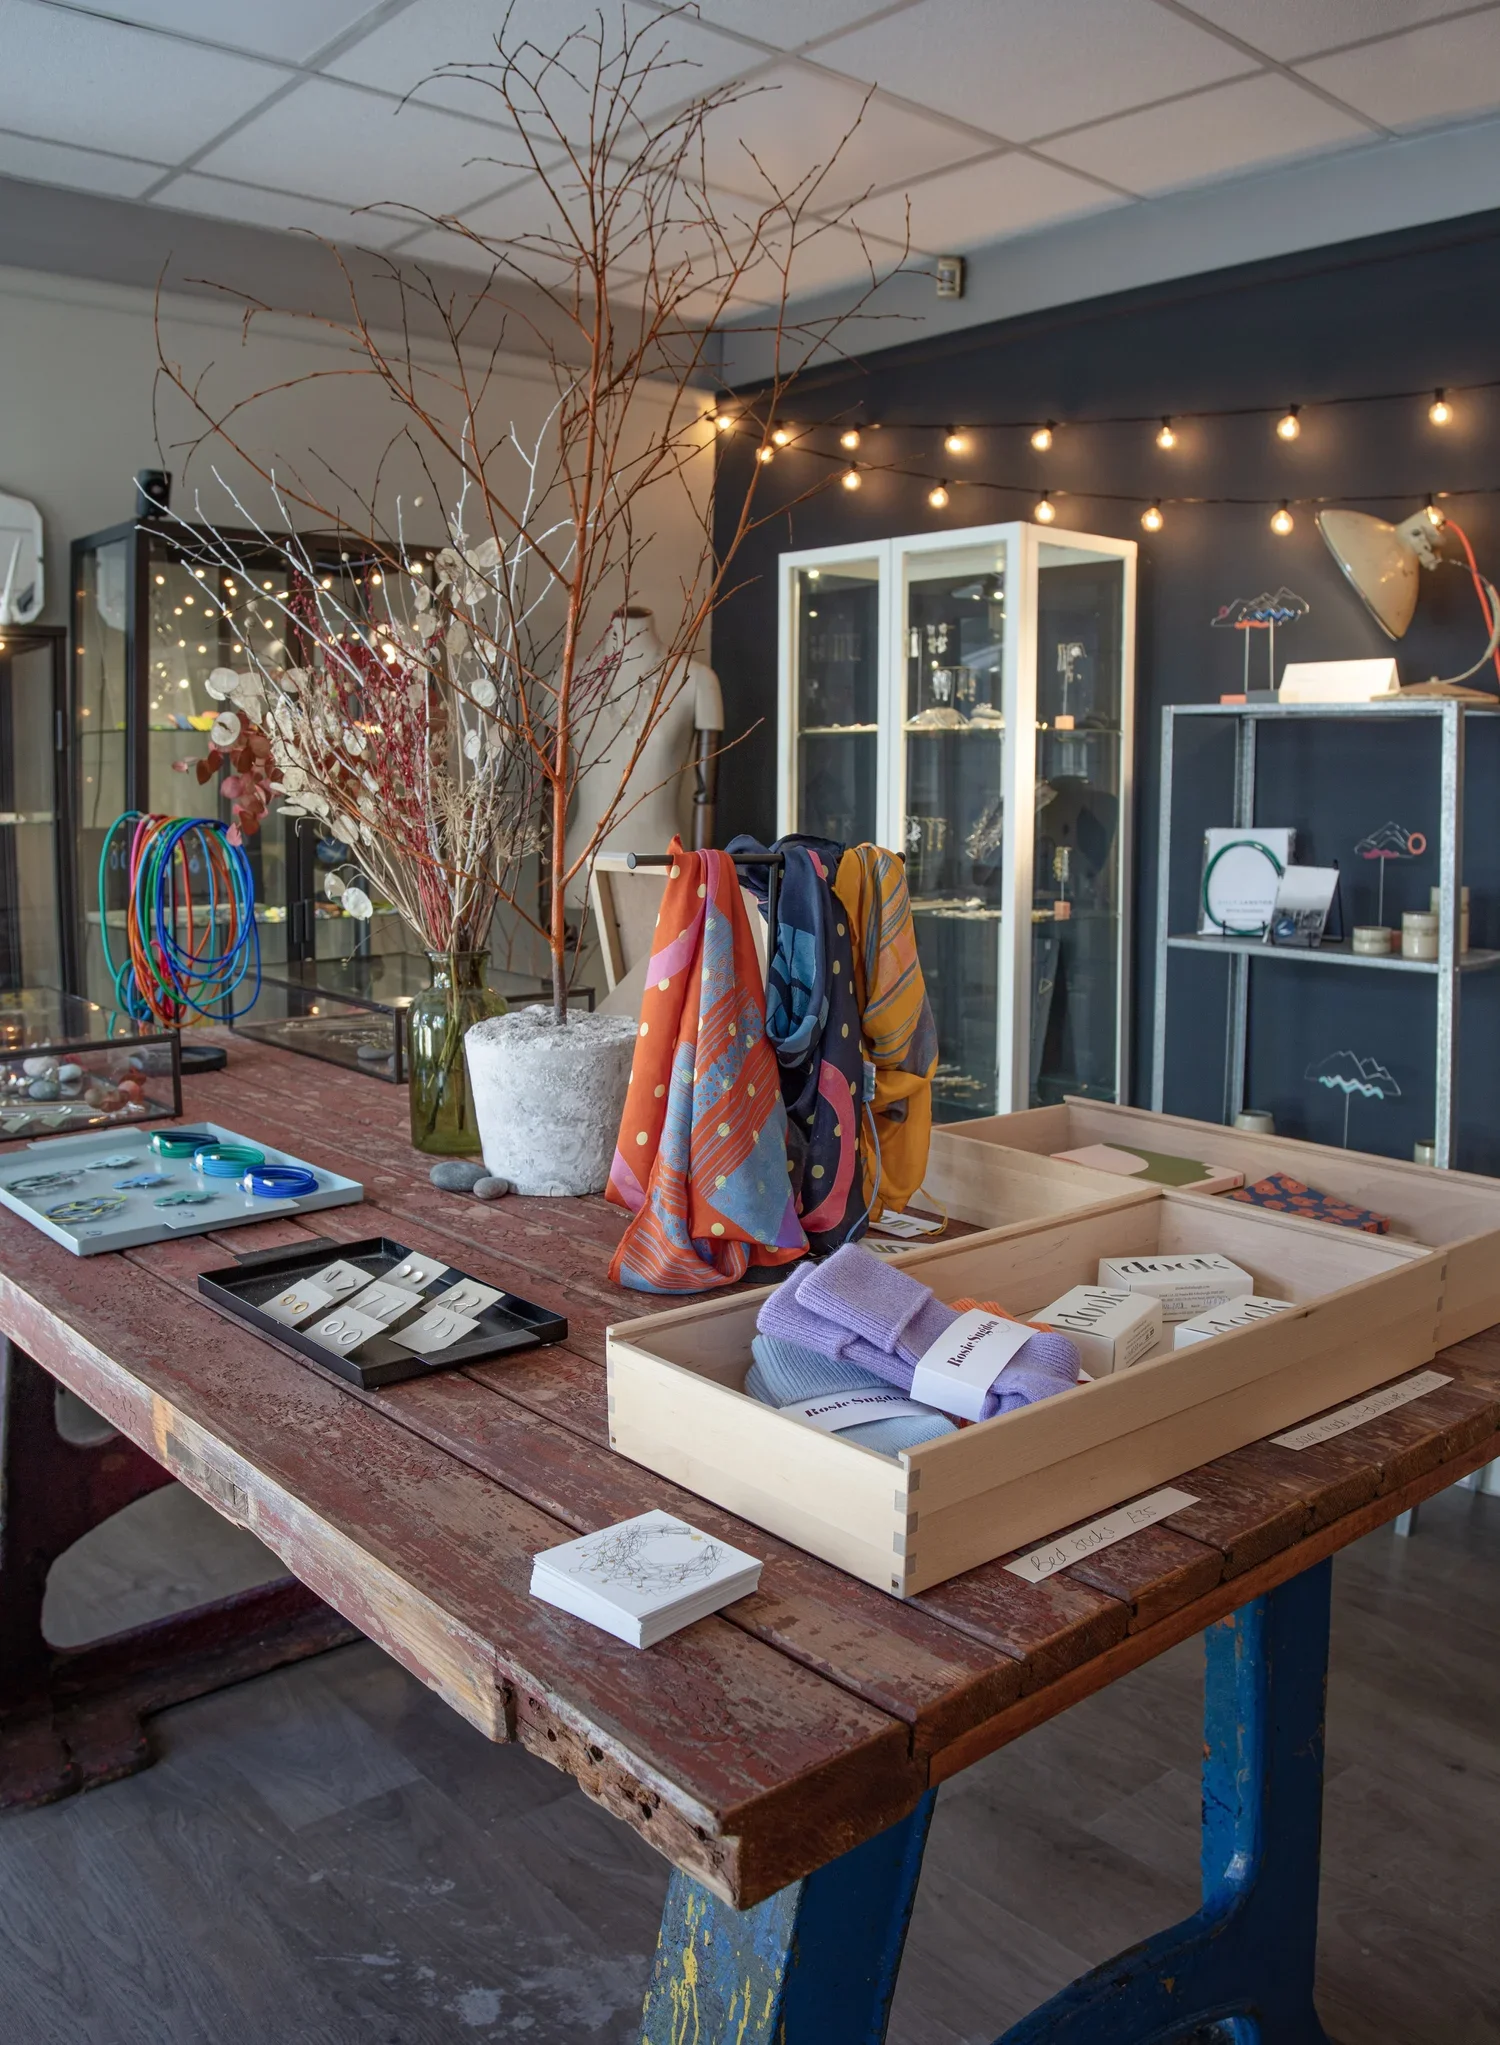
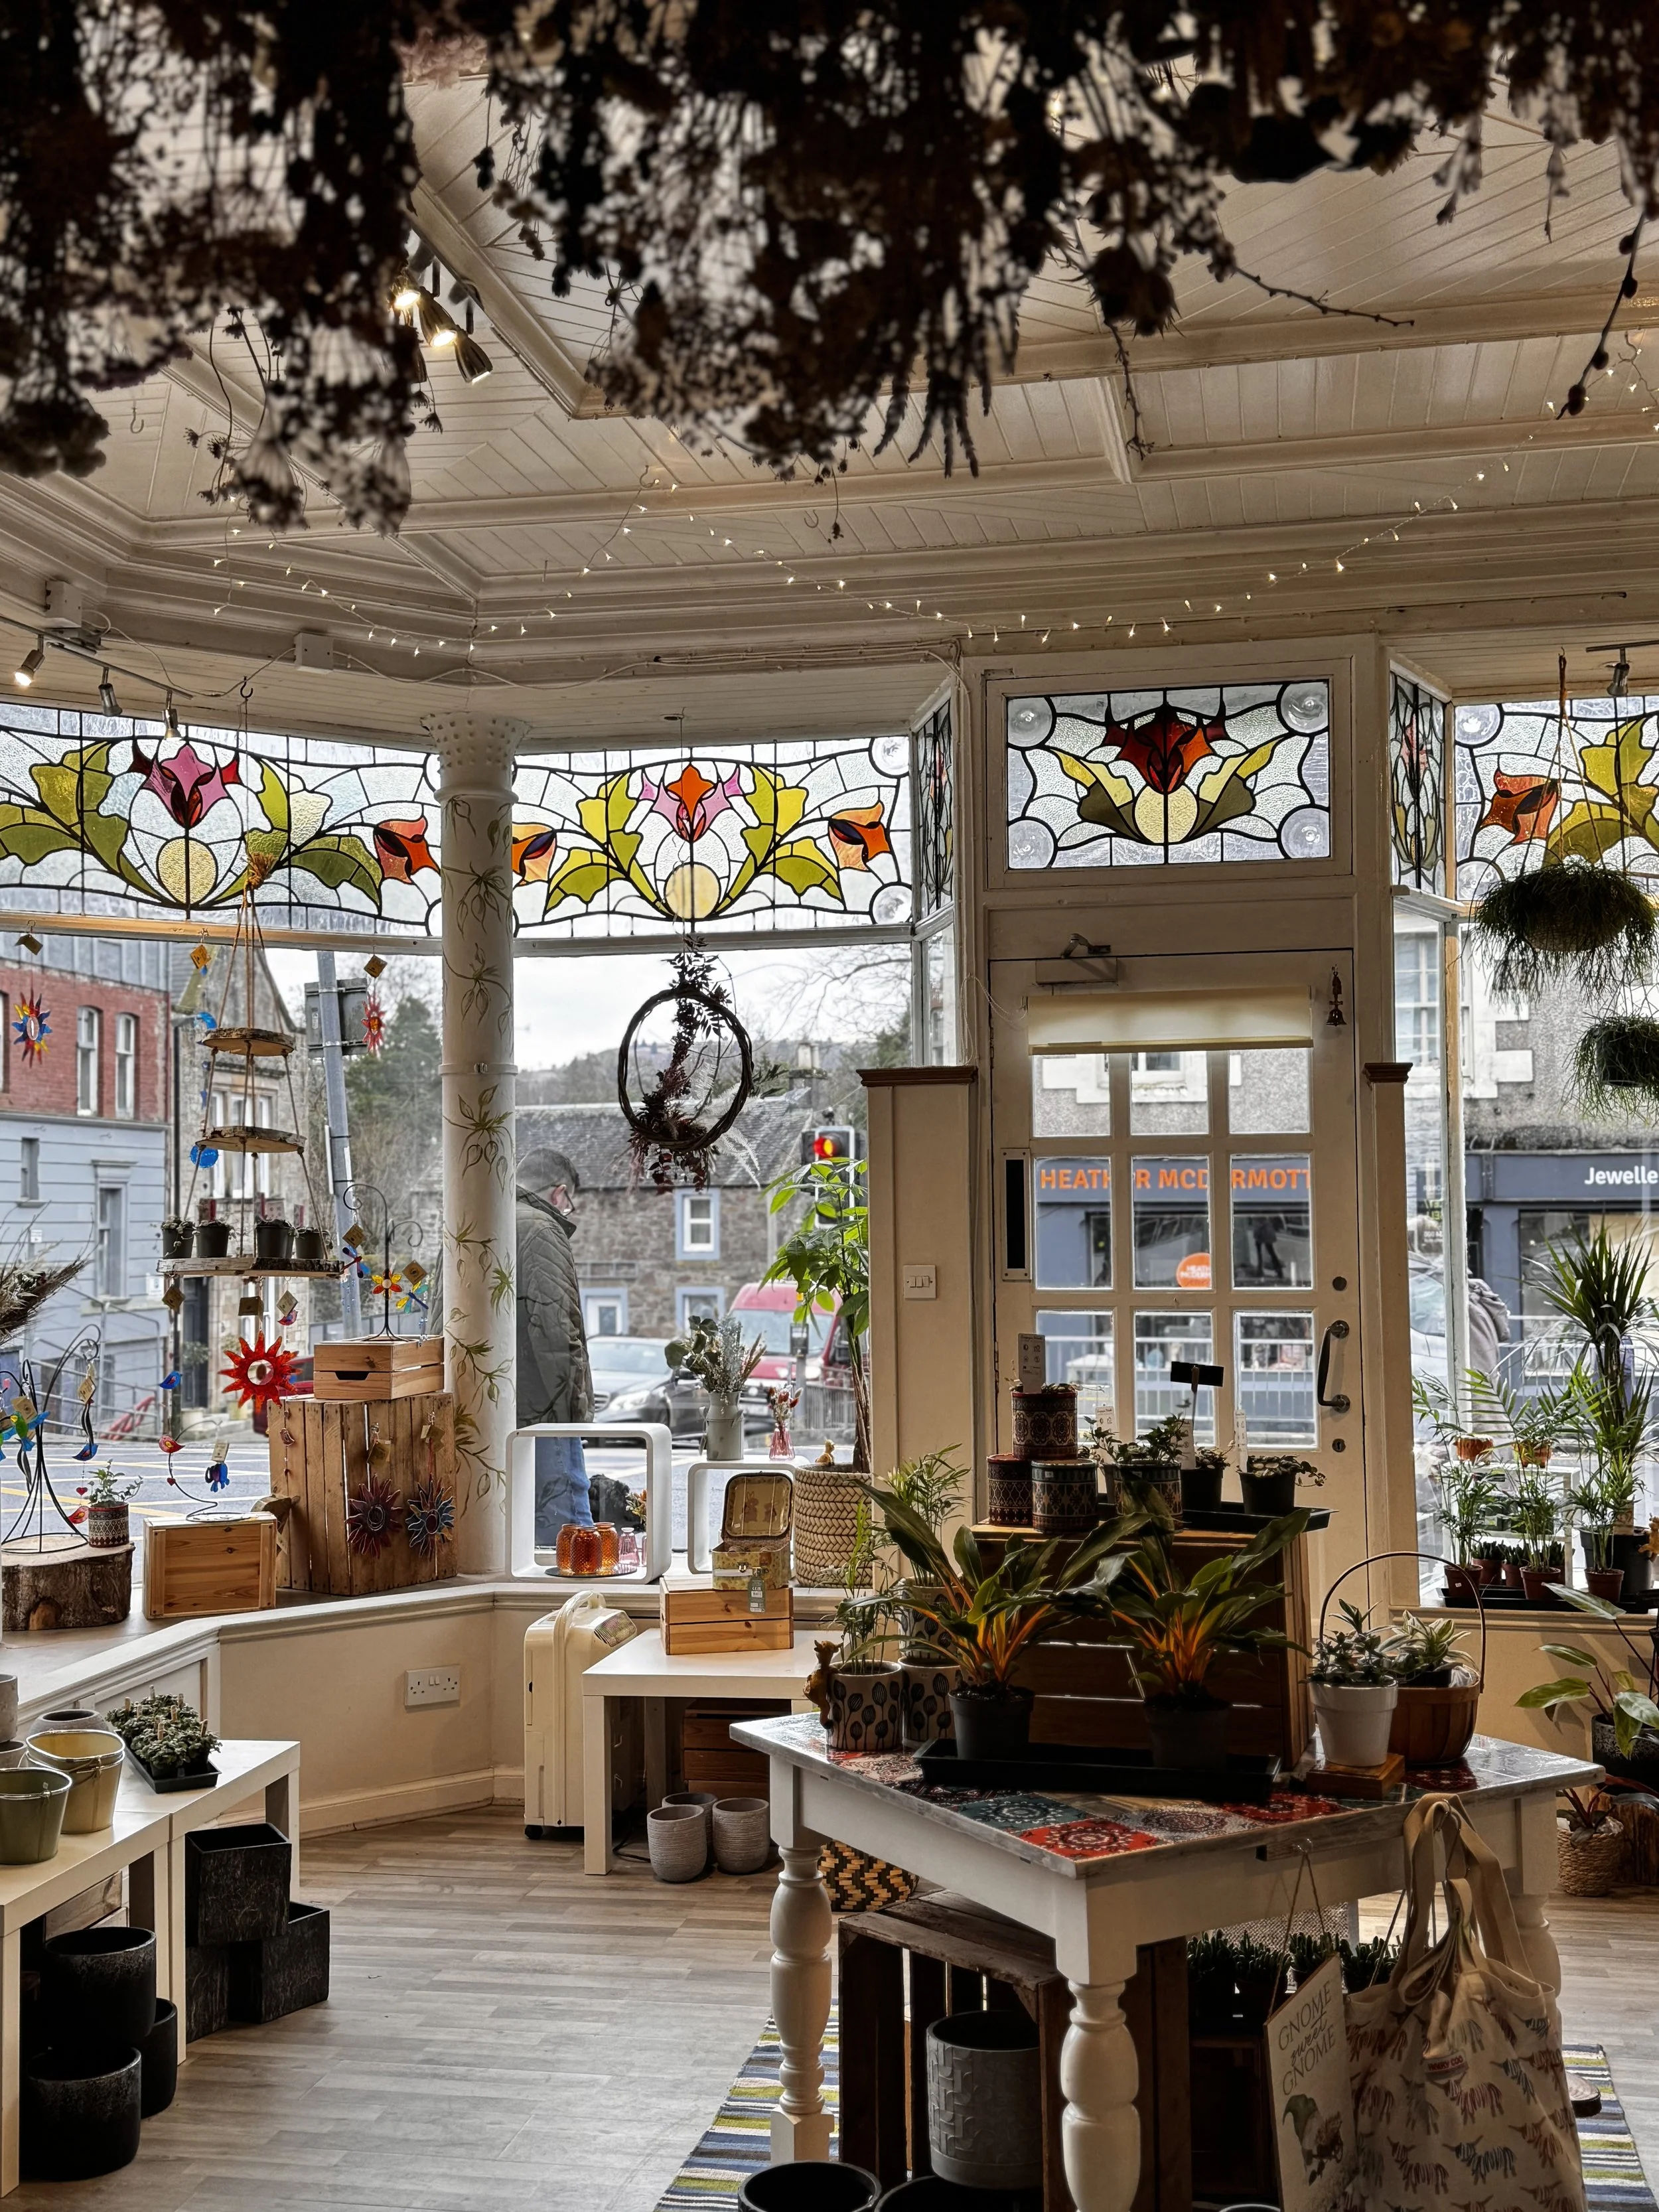
This project started back in January during a birthday adventure Ed and I took to Callander. While there, we stumbled upon the gorgeous Stitchcraft wool shop, which I didn’t even know existed! Their selection of yarn was simply too good to resist! (If you ever visit Callander, be sure to check out my other favourite shops: Heather McDermott Jewellery and Willow Botanic, and grab a bite at the scrumptious Mhor Bread).

The Quest for the Right Pattern
I faced a dilemma in the wool shop. With so many gorgeous brands and sumptuous colours to choose from, I really had to think about what I wanted to buy (technically Ed bought it - it was my birthday, after all!). The first thing I had to do was figure out what I wanted to knit. I had saved the pattern for Second Grace by Bristol Ivy a few years ago, so it made sense to see if I could get yarn to make this joyous sweater.
Bristol Ivy Patterns are available on Ravelry.
The Secret to Choosing Colours
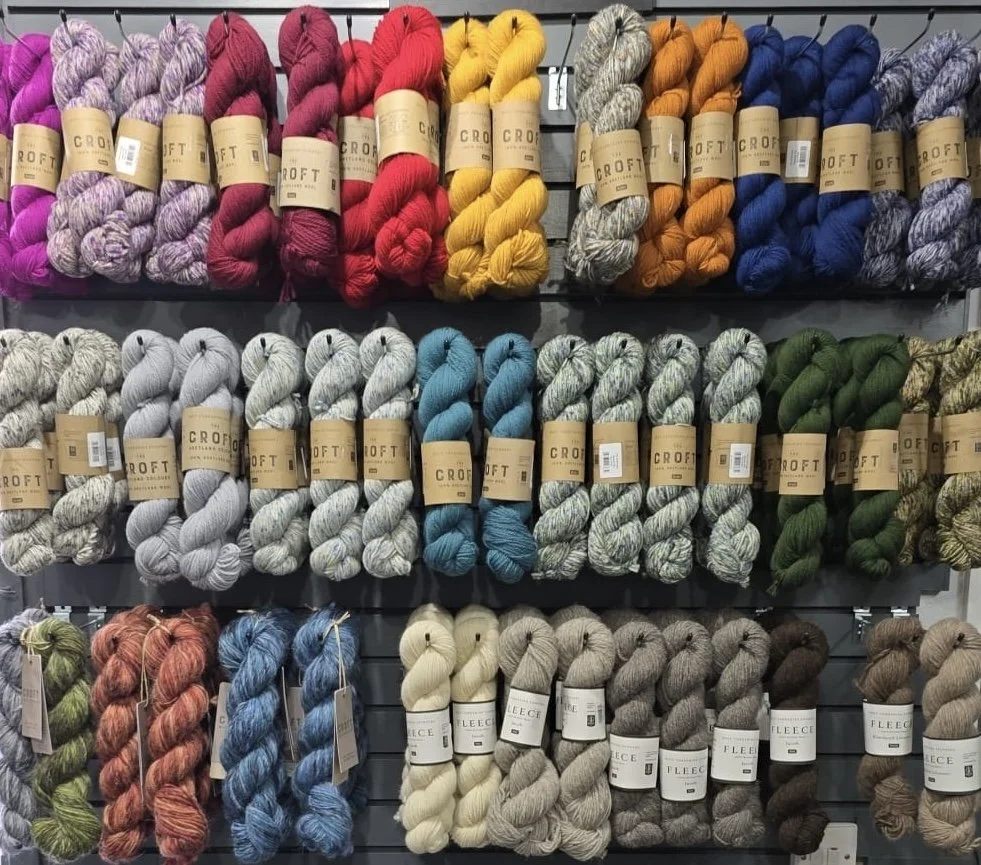
When I’m knitting clothes for myself, I rarely go with the colours represented in the pattern. I have a favourite colour palette for most of the things I wear, and it just makes sense to me to ensure that the garments I knit will go with the clothes already in my wardrobe.
One of my top tips for choosing colours, especially for a colourwork design, is to look at their tonal value. You need to know which ones are light and which are dark so that you will get the best contrast. To do this, I always look at things in black and white. Fortunately, that’s so easy these days: just put a grayscale filter on a photo of the pattern or yarn you’re considering, and you will soon see what works and what doesn’t.


Slow Fashion: Knitting for a Sustainable Wardrobe
Knitting clothes to wear is part of my slow fashion philosophy. On Instagram, you will often see me use the hashtag #lovedclotheslast. For me, as I try to live as sustainably as I can, it’s important that I only buy and make garments that I will actually wear. Everything I my wardrobe is worn frequently, often mended, and cared for well.
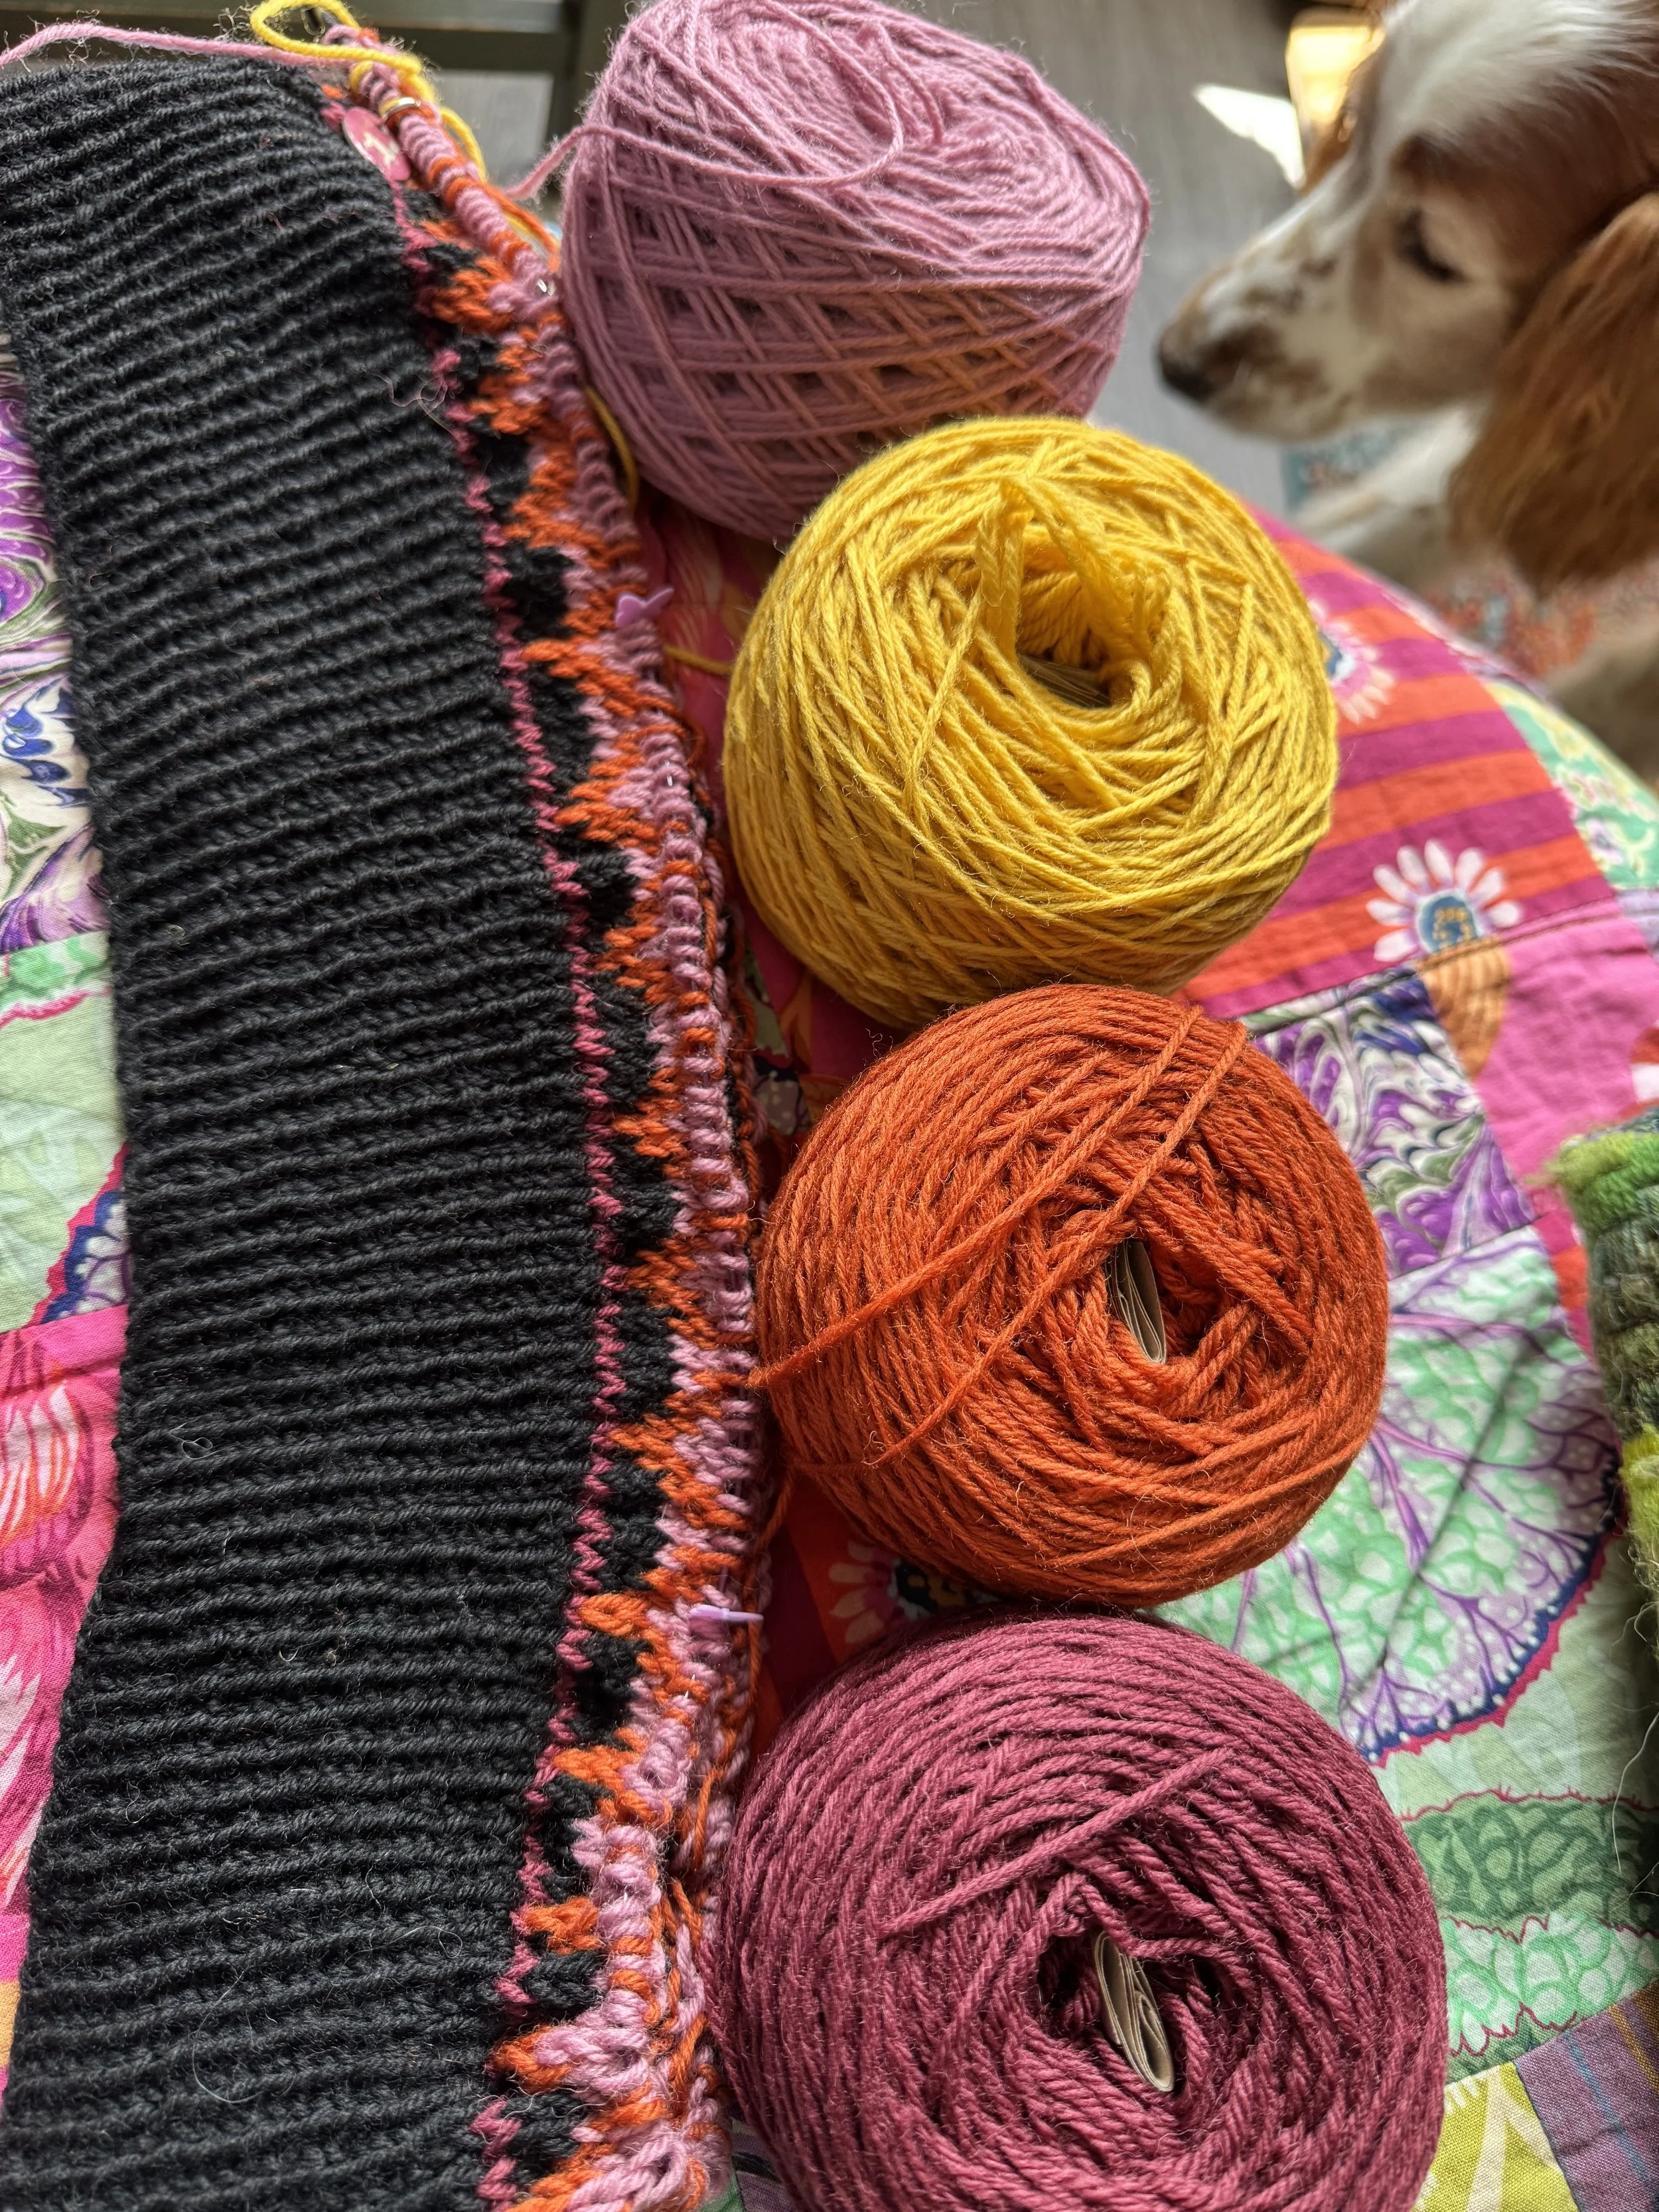
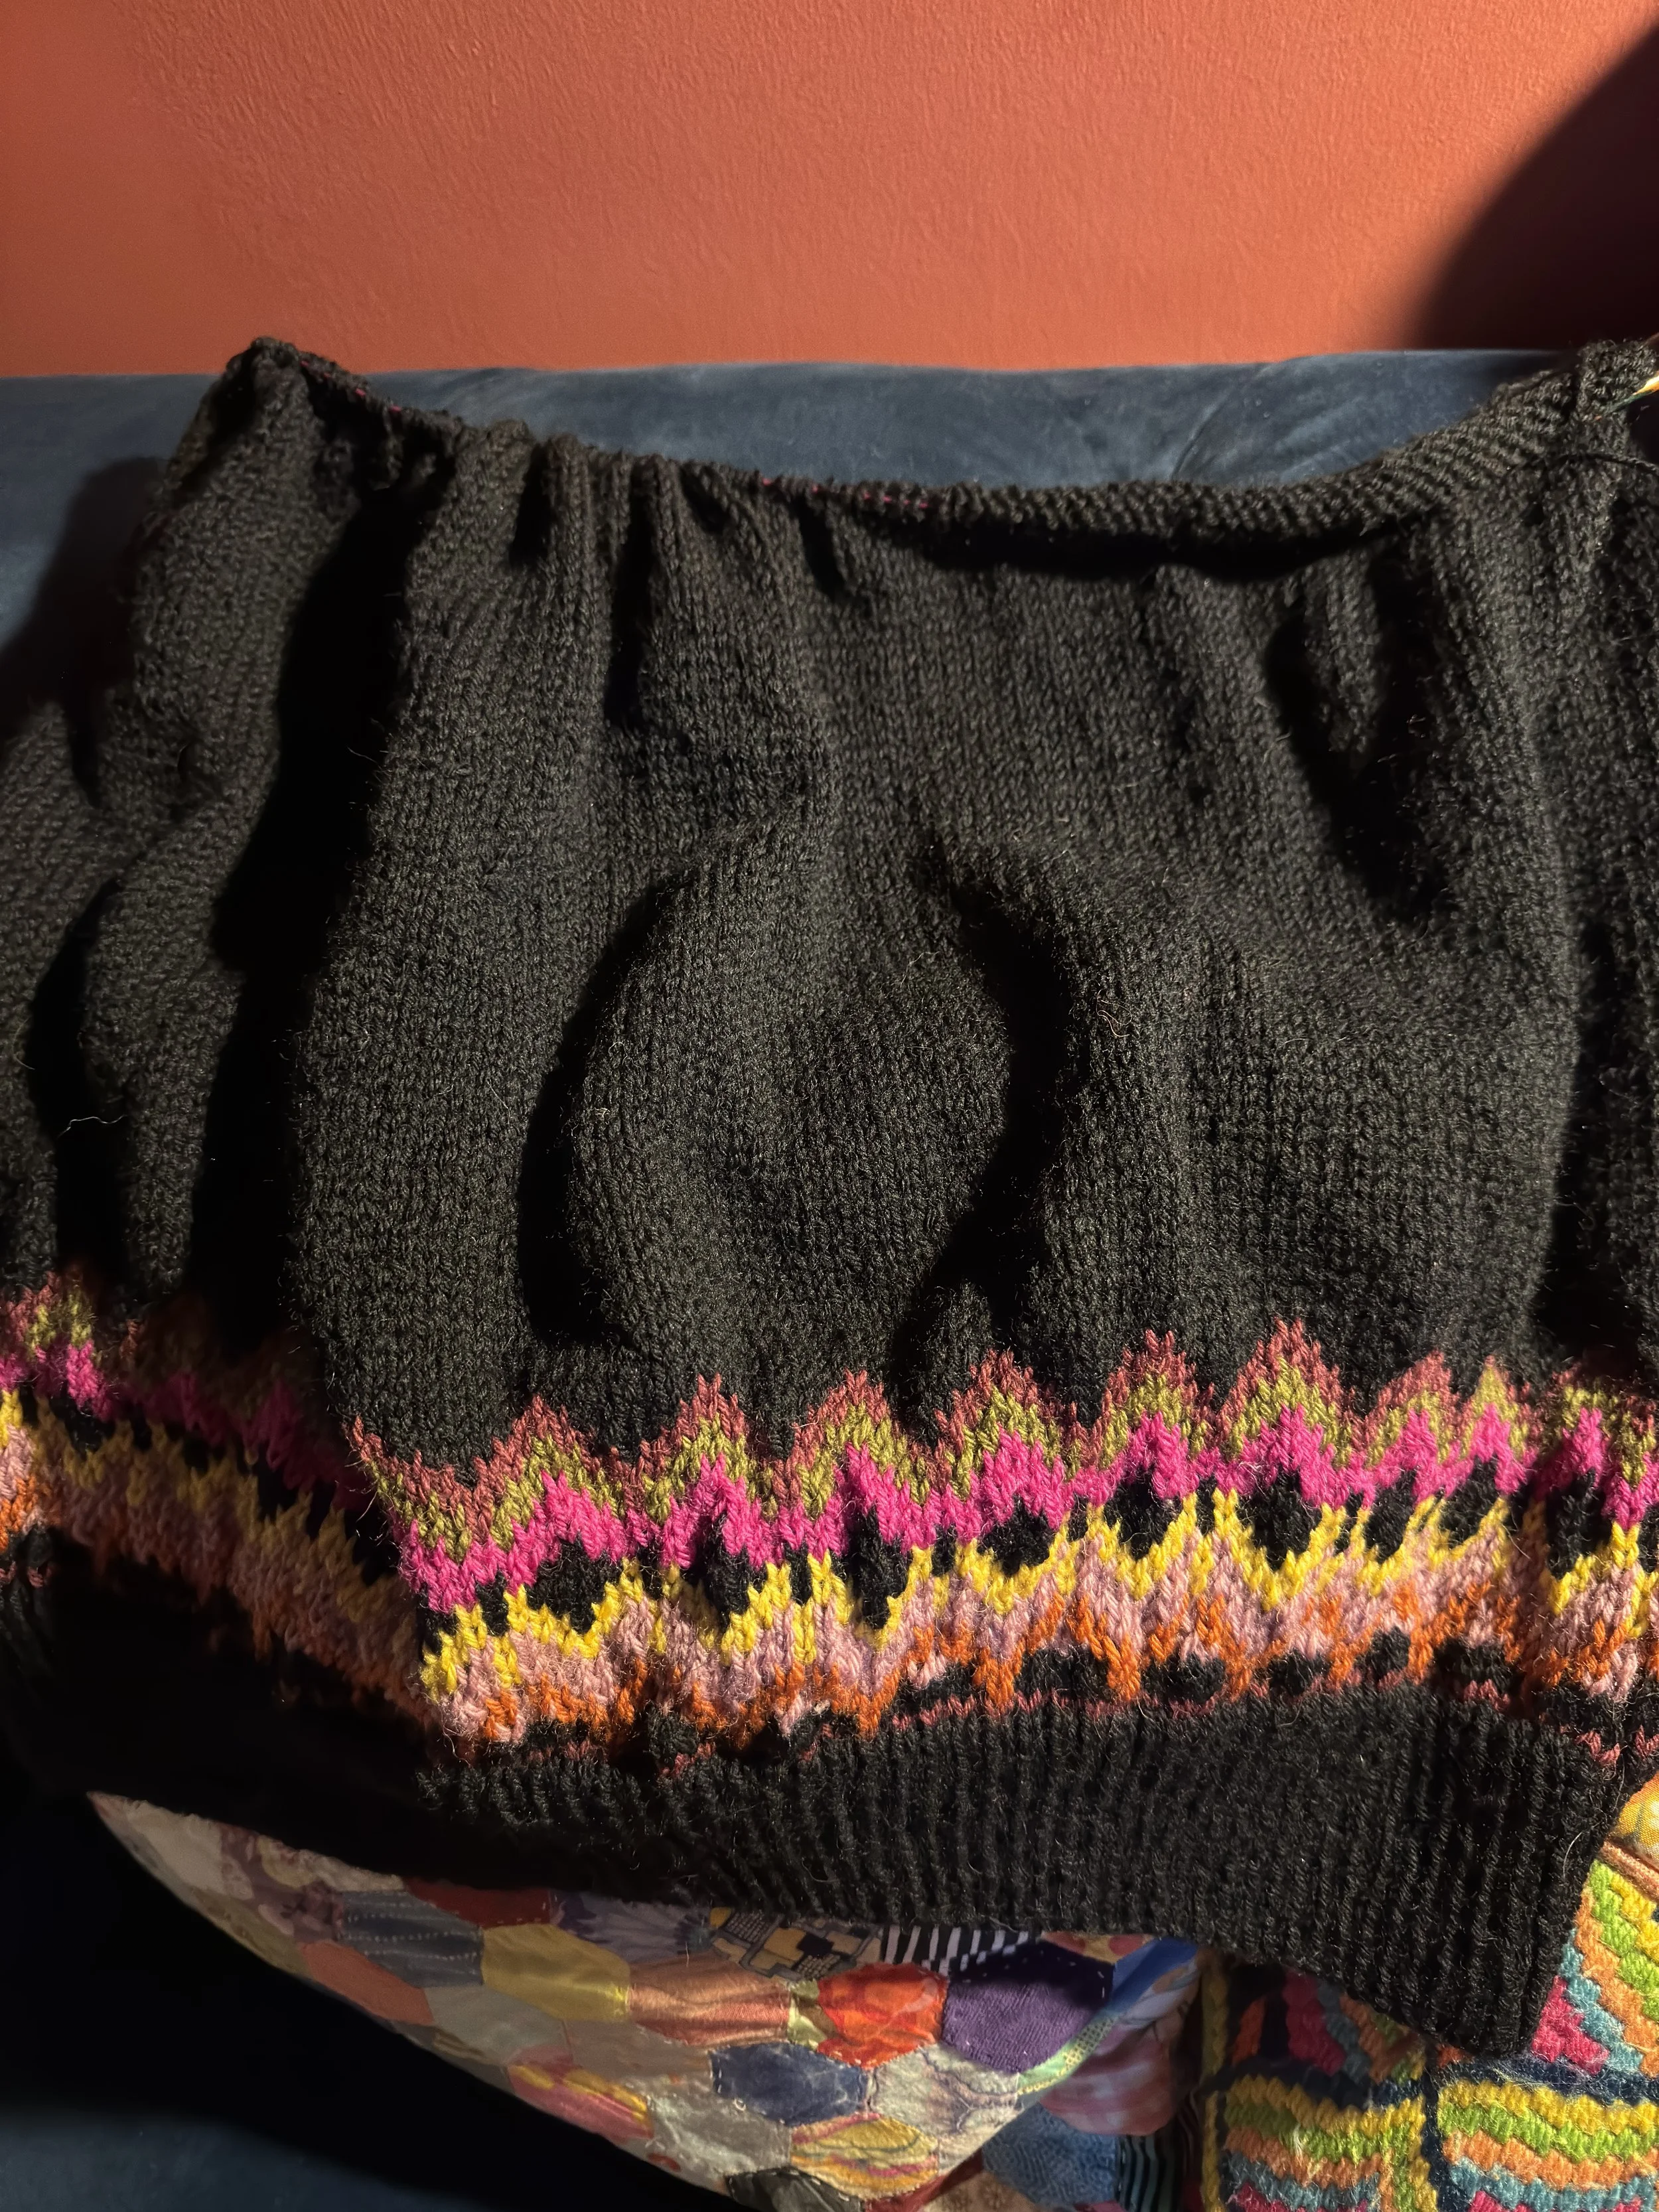
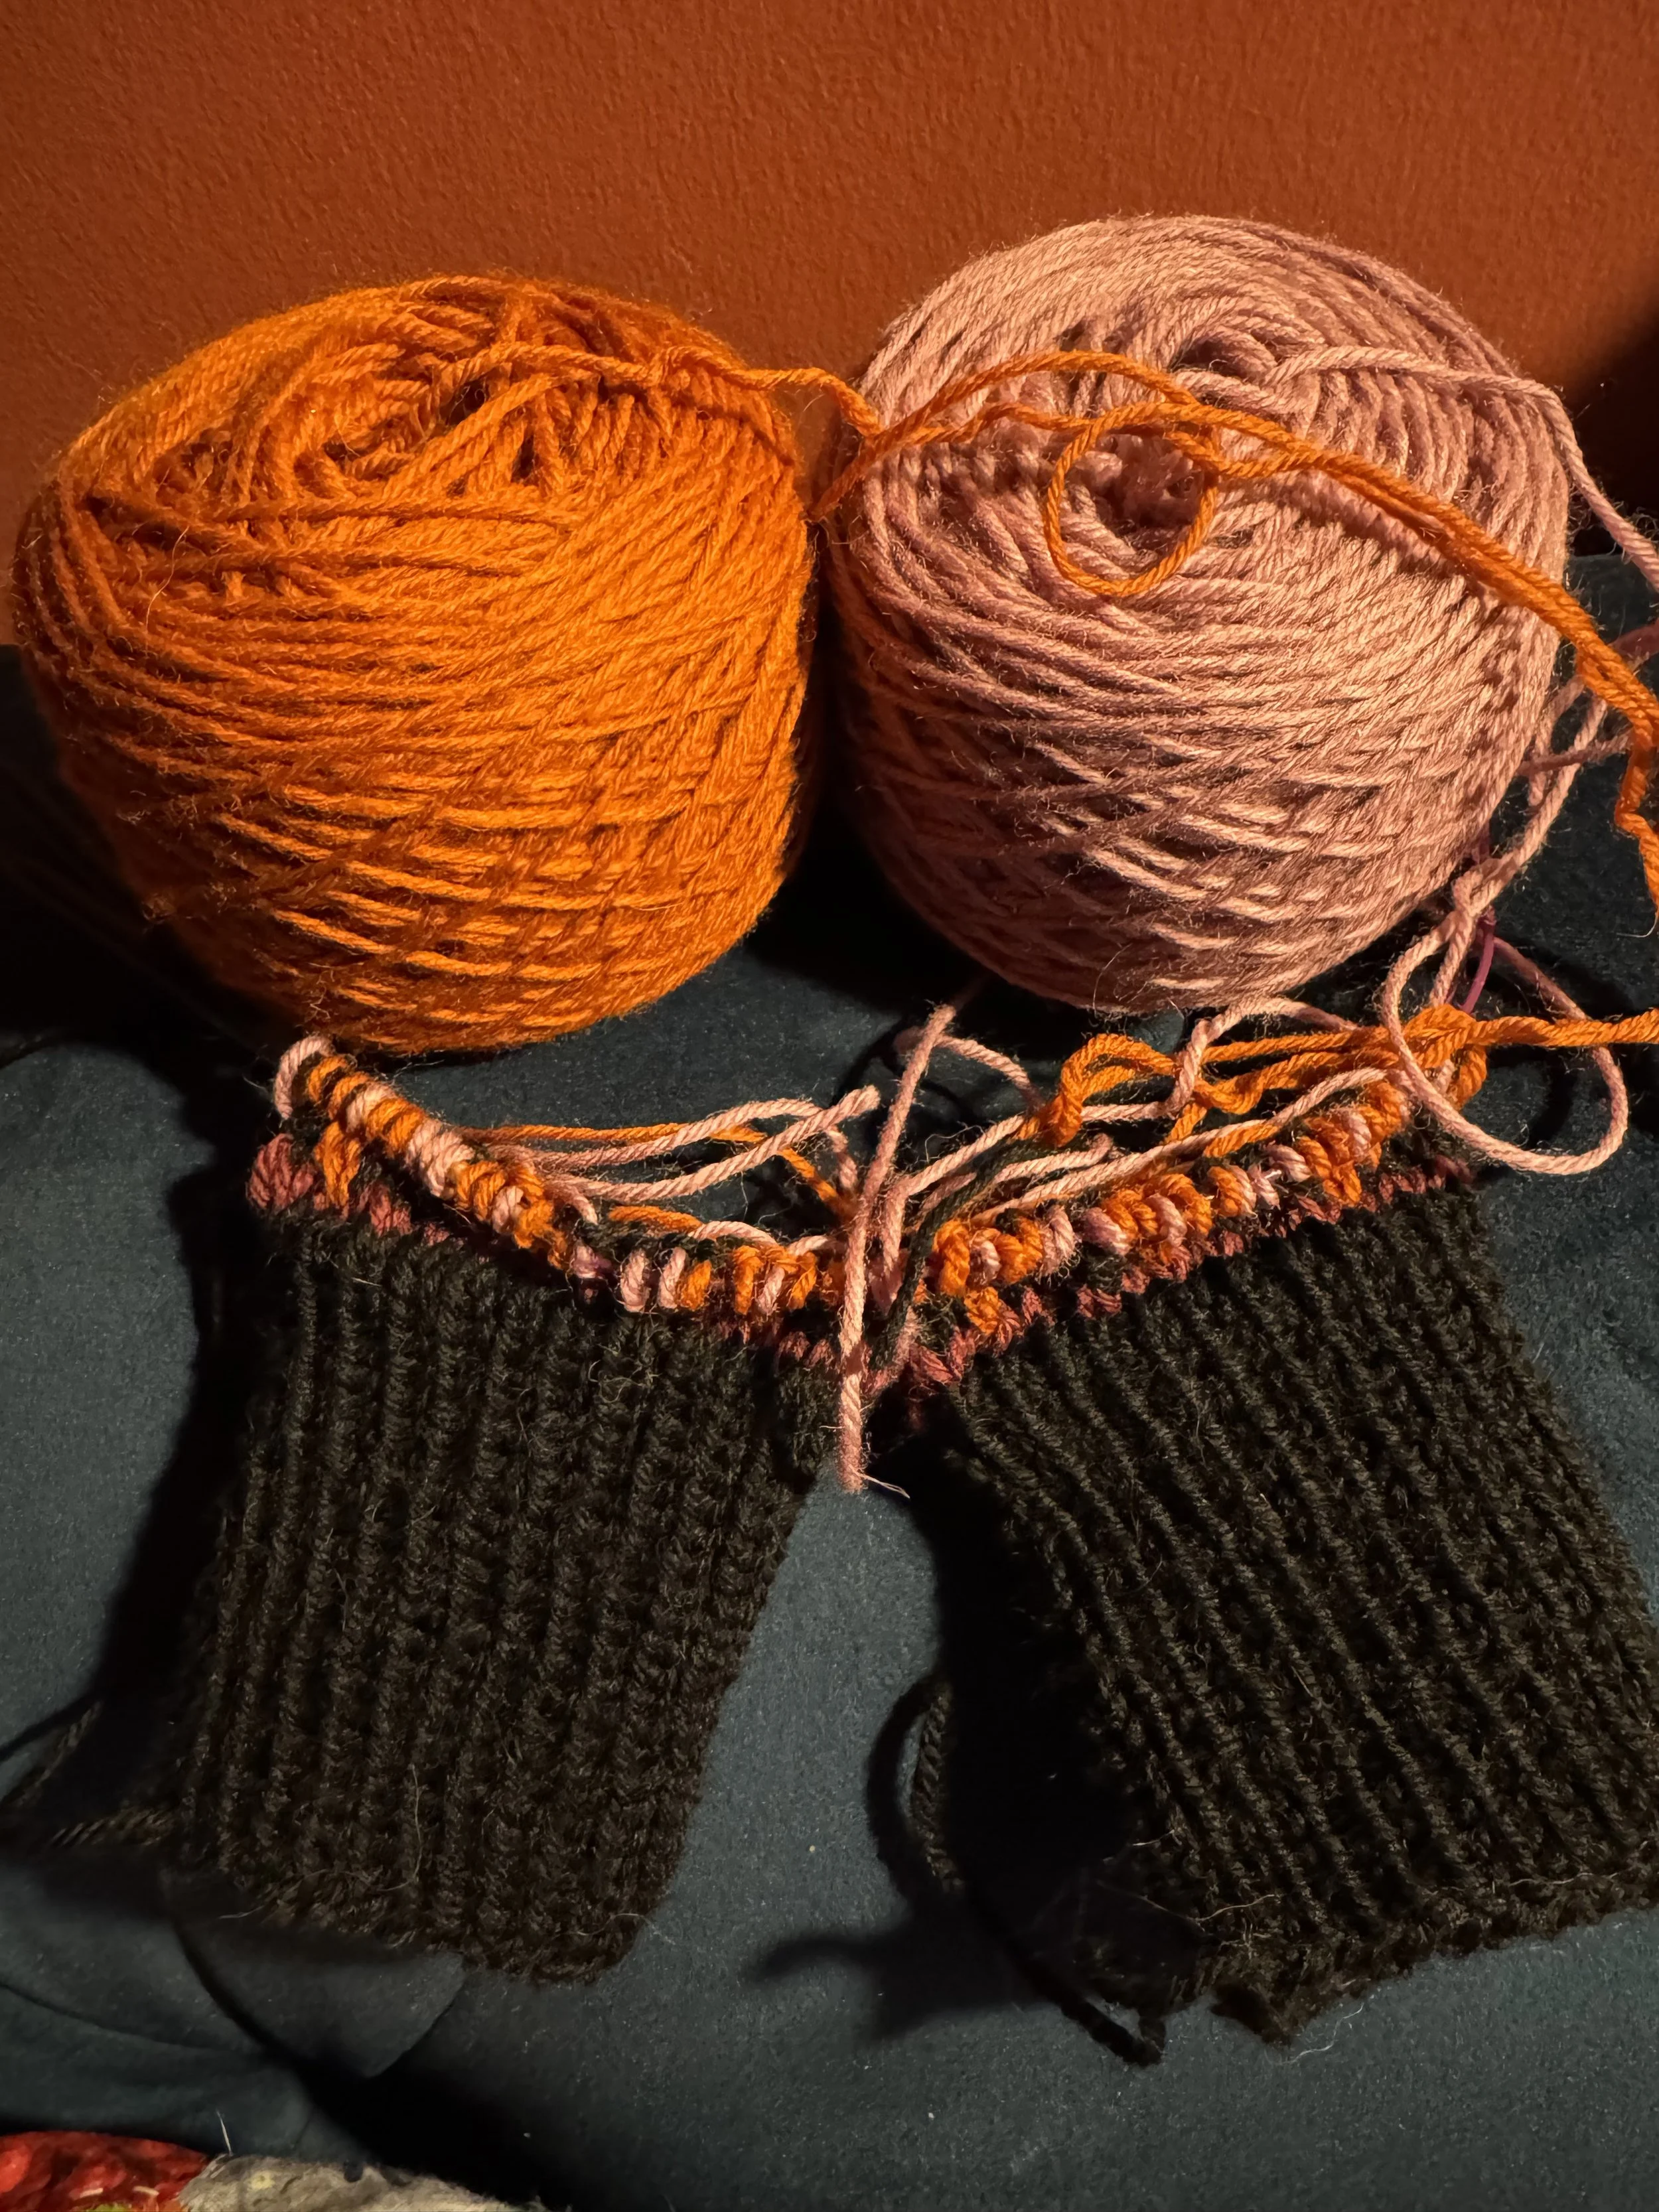
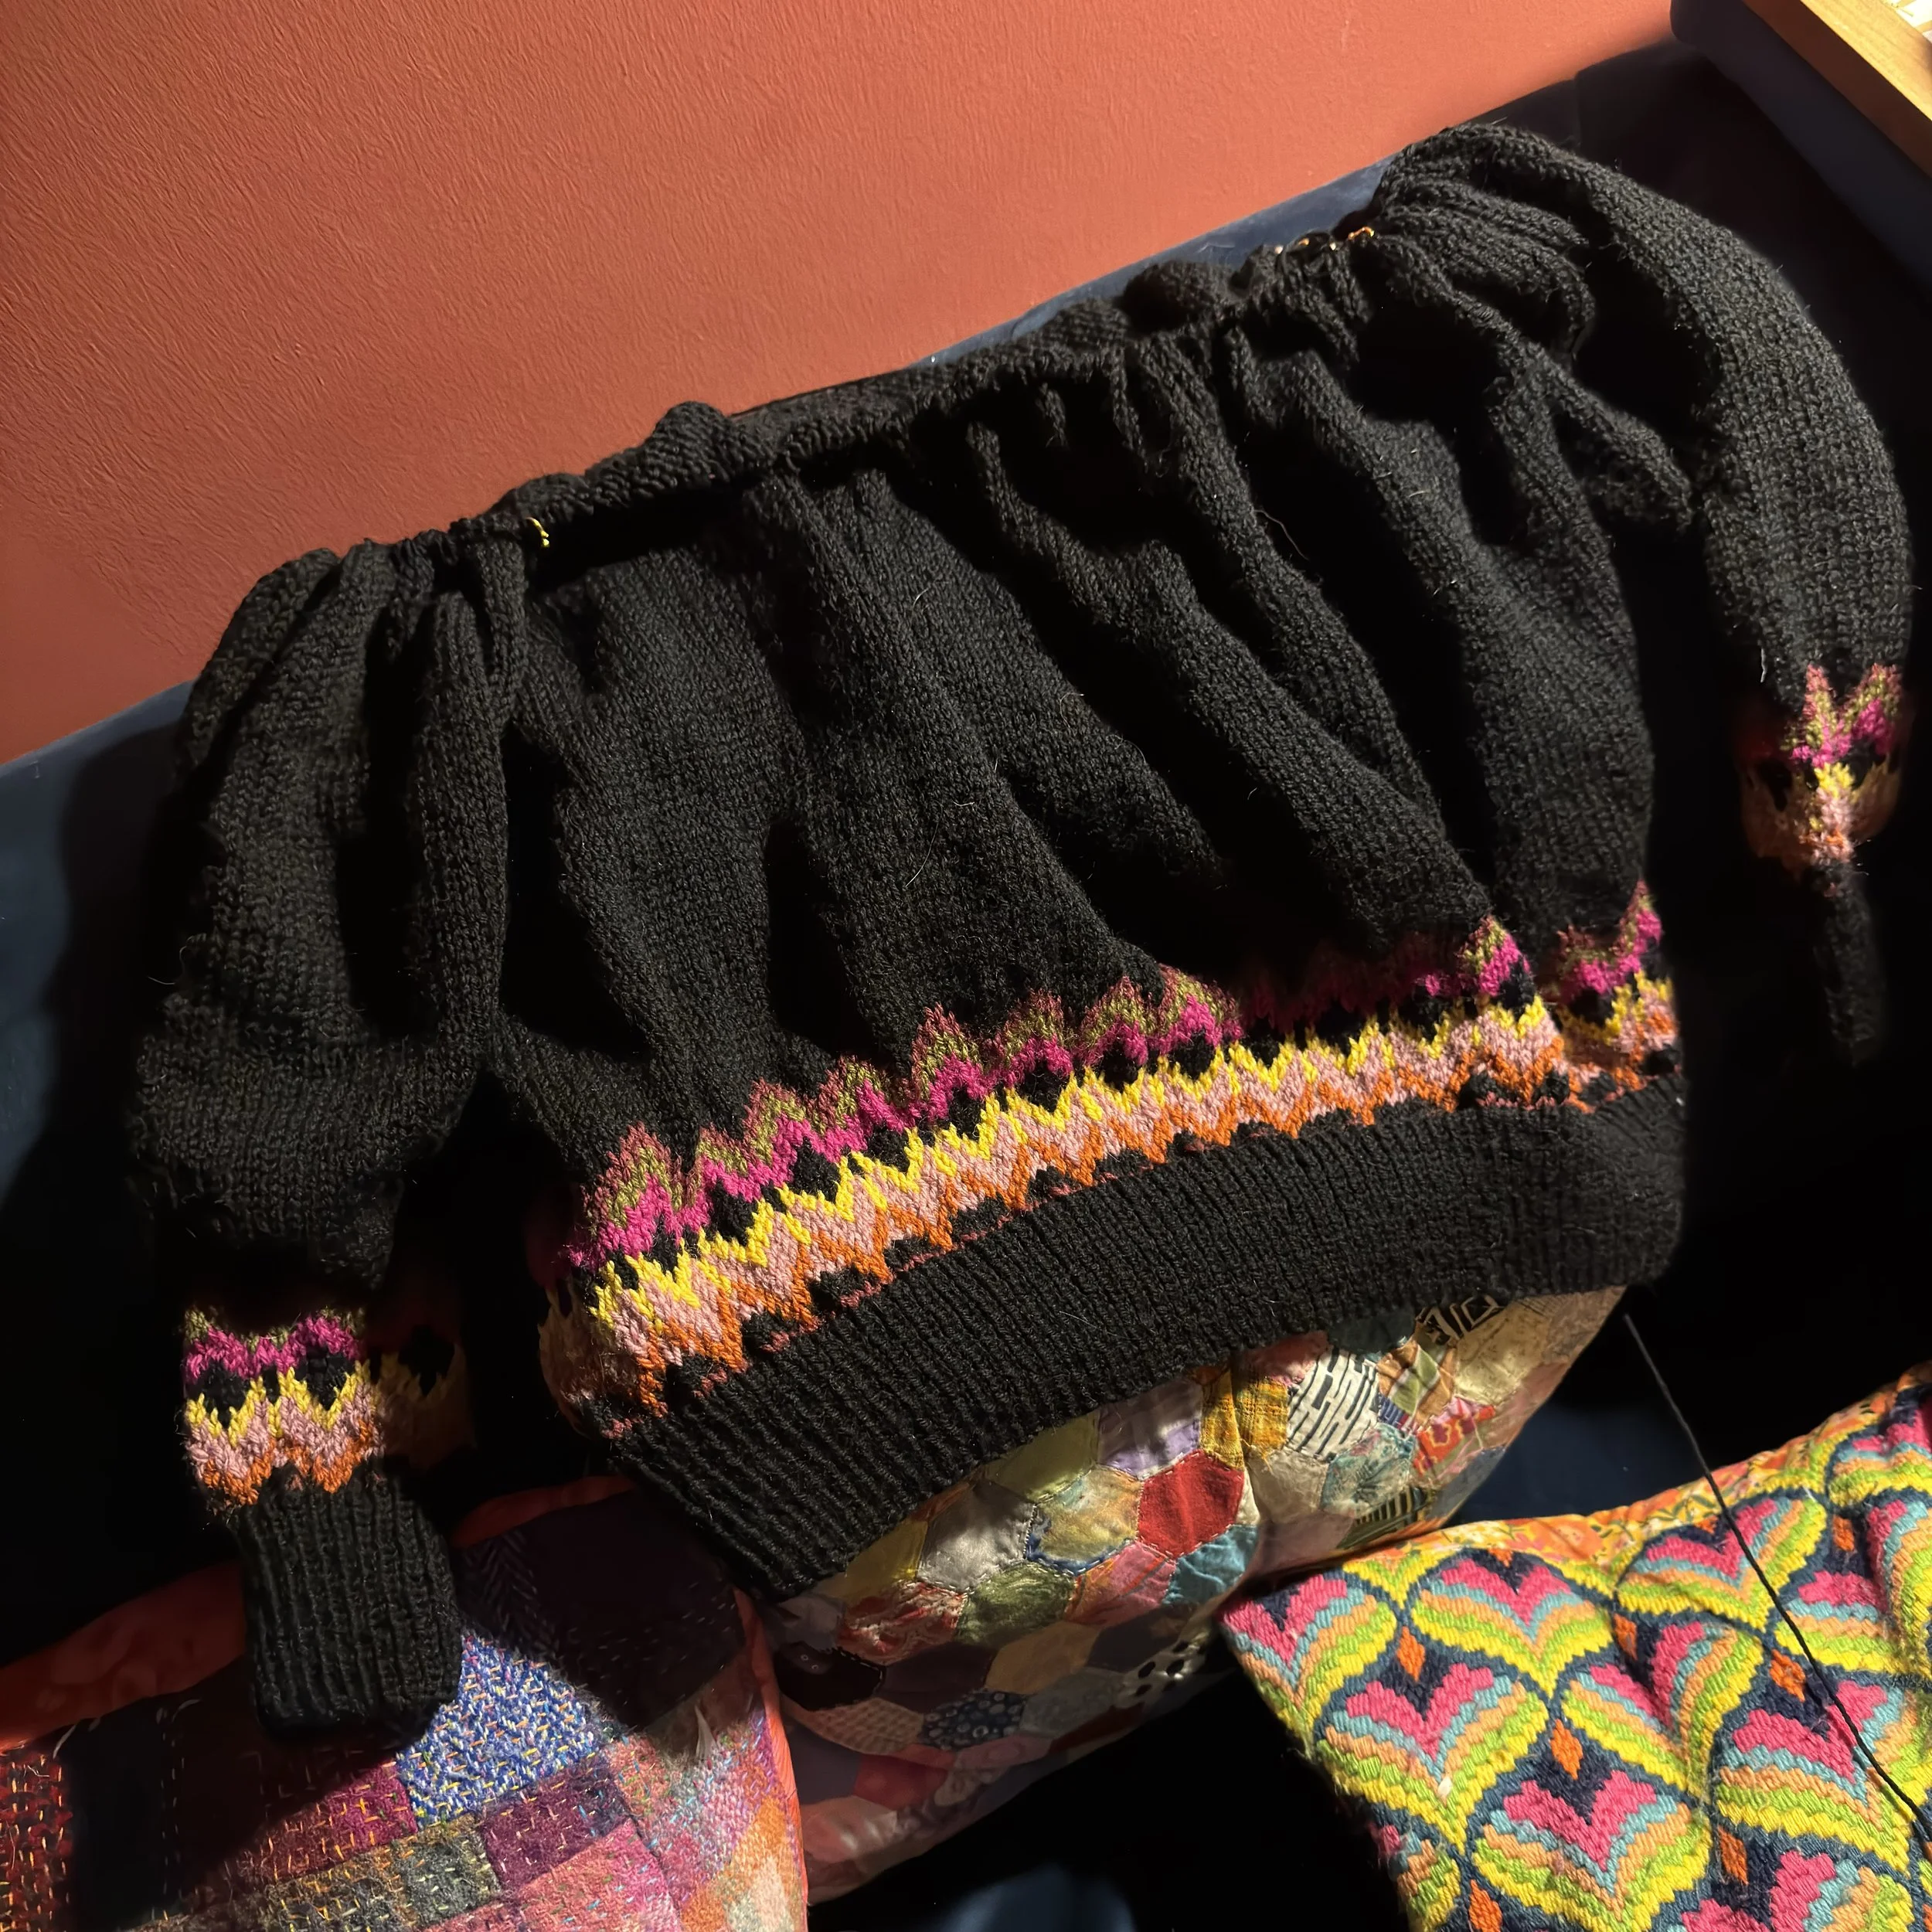
I buy or make clothes to fill specific gaps and I was keen to have a black jumper. I knew this pattern would look great with black as the main colour, letting a patterned yoke really pop! The orange, fuchsia, green and yellow shades I chose are colour staples in my wardrobe. The pale pink and burgundy then added the contrast I needed to make the pattern flow. I was delighted that I was able to build a colour palette for this sweater that would work so well with the rest of my clothes.
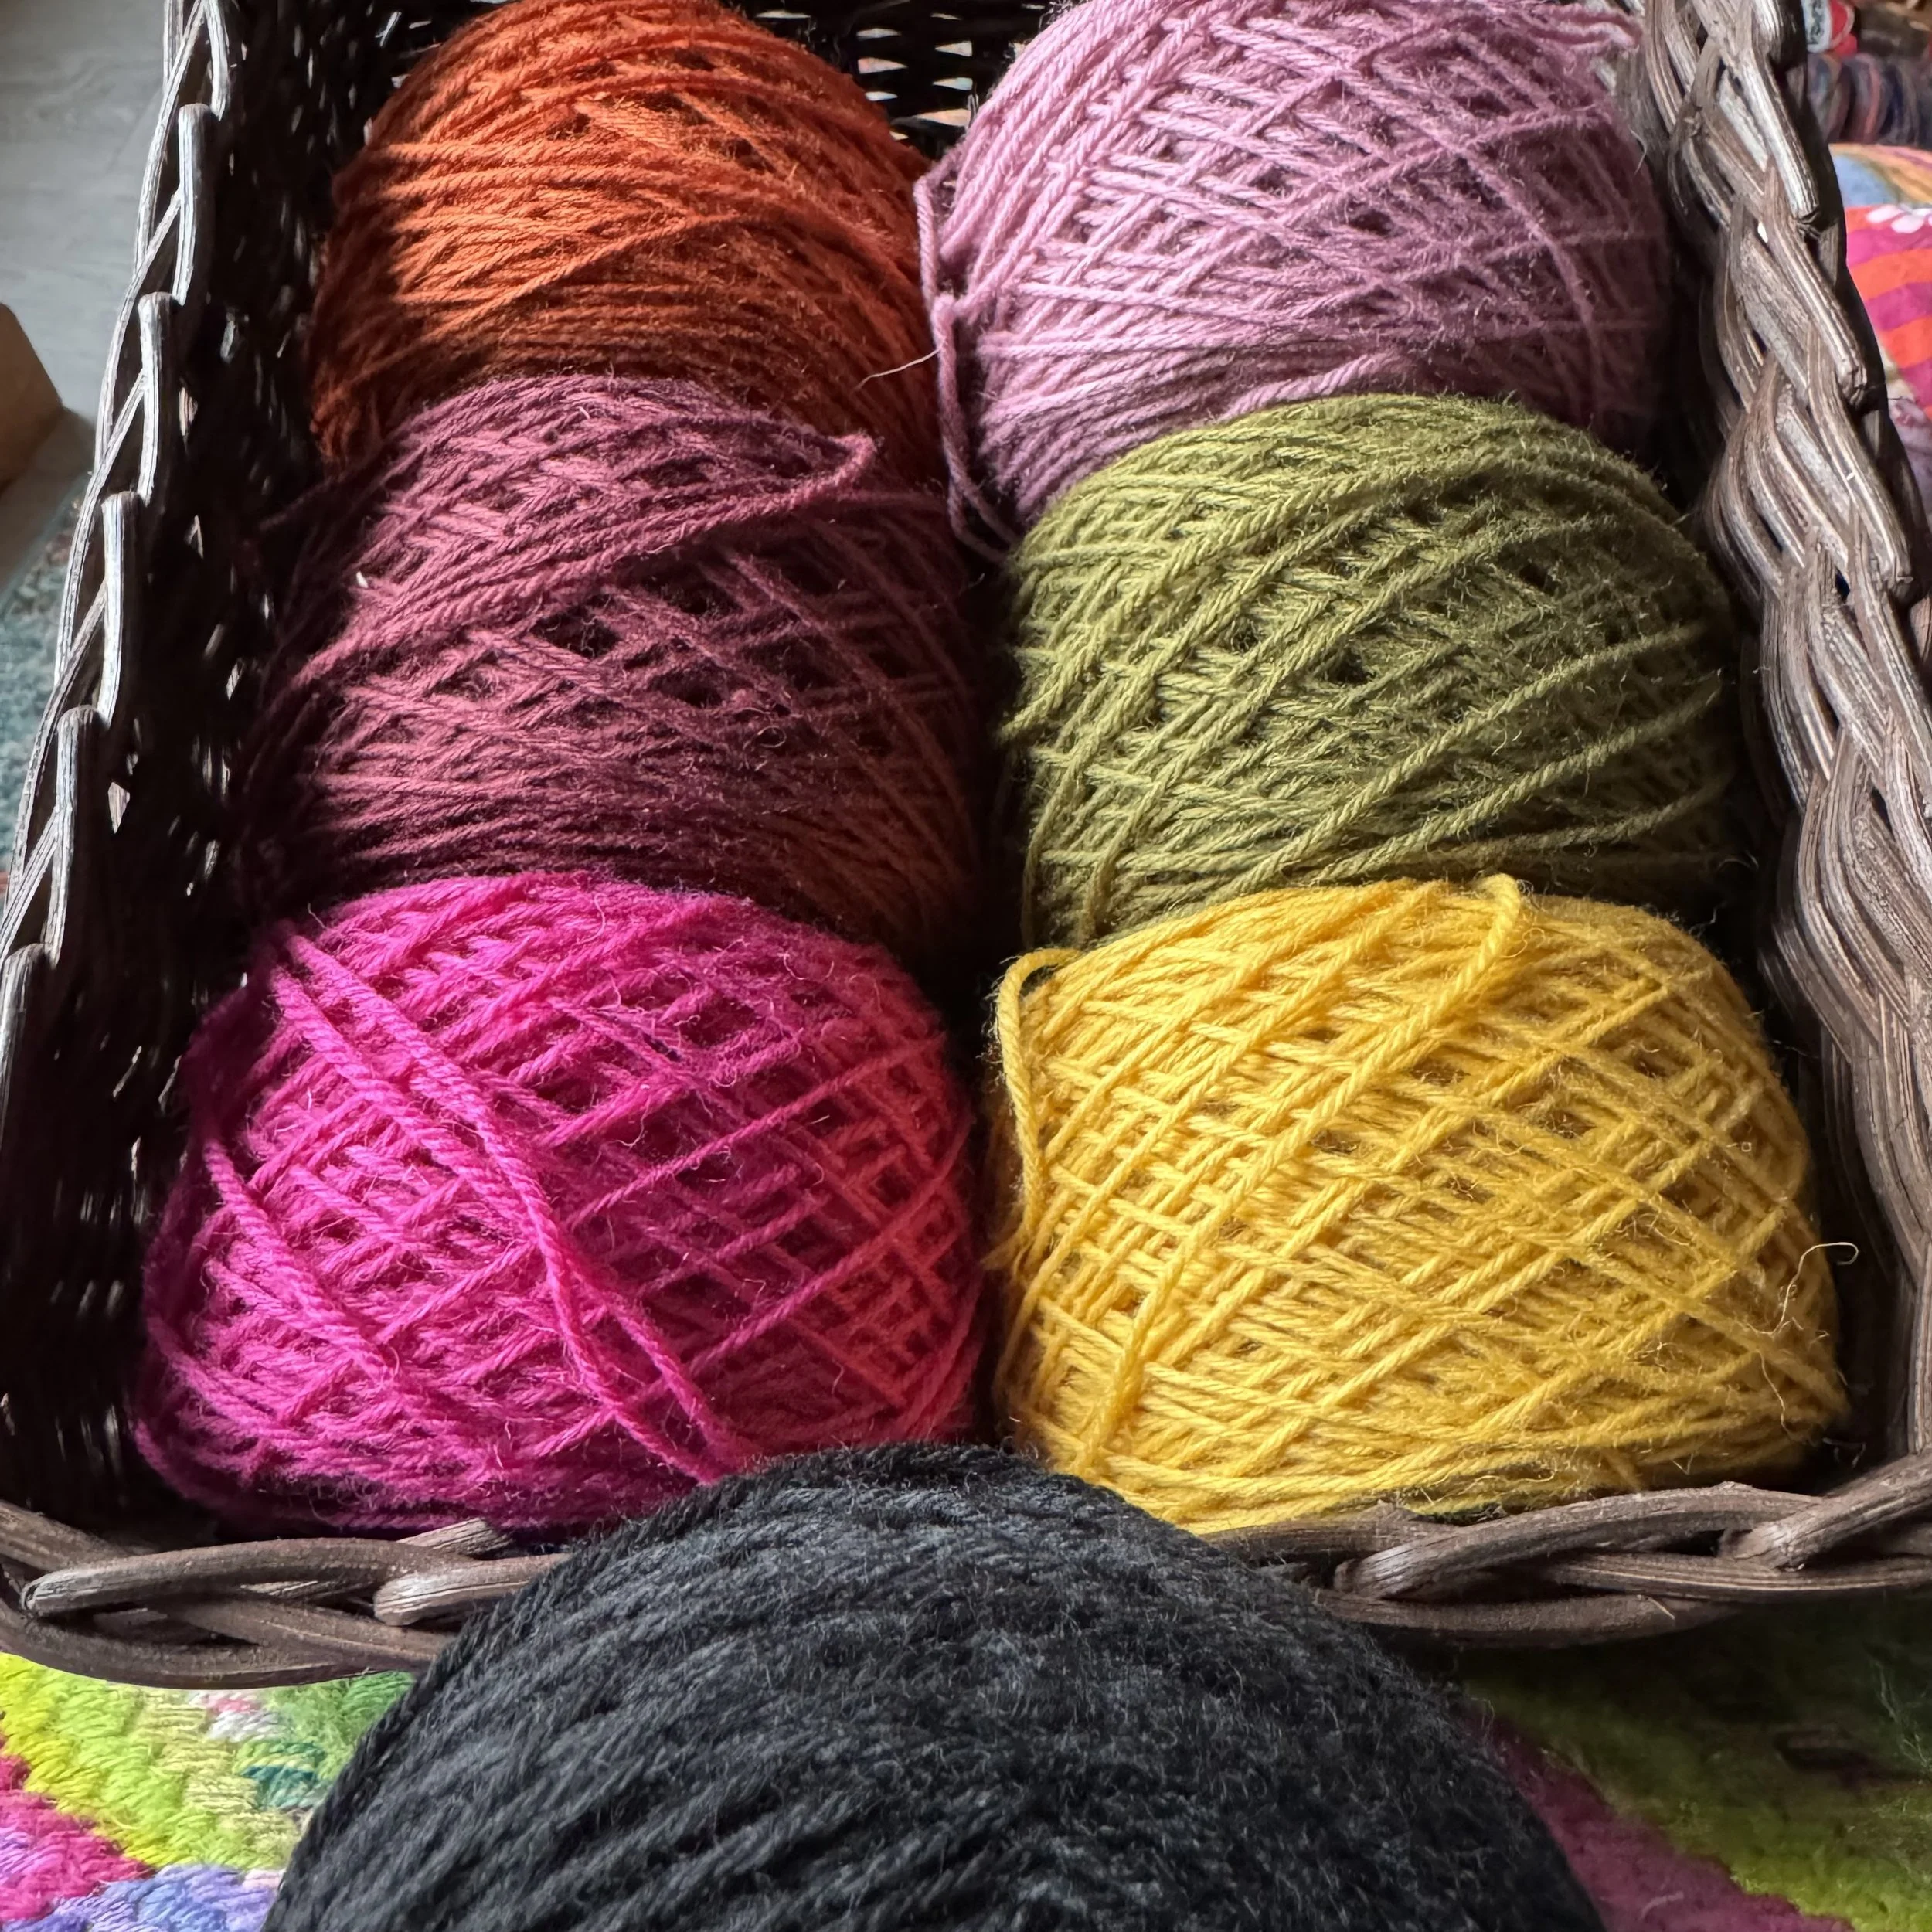
All West Yorkshire Spinners Croft Aran weight 100% wool (except the fuchsia)
From Lagging to Launch: The Summer of Second Grace
If you read the last two blog posts, you’ll know I was on a mission to finish off pieces that had been languishing for a while. As I focussed on the Virgina Cardigan, and the Pink Easy V Sweater as part of the 100 days project, it was the middle of June before I cast on Second Grace. This meant that the project was on the needles over the summer, and I got to knit it on my adventures. I also got to knit it during the heatwaves we had, which wasn’t quite as much fun!
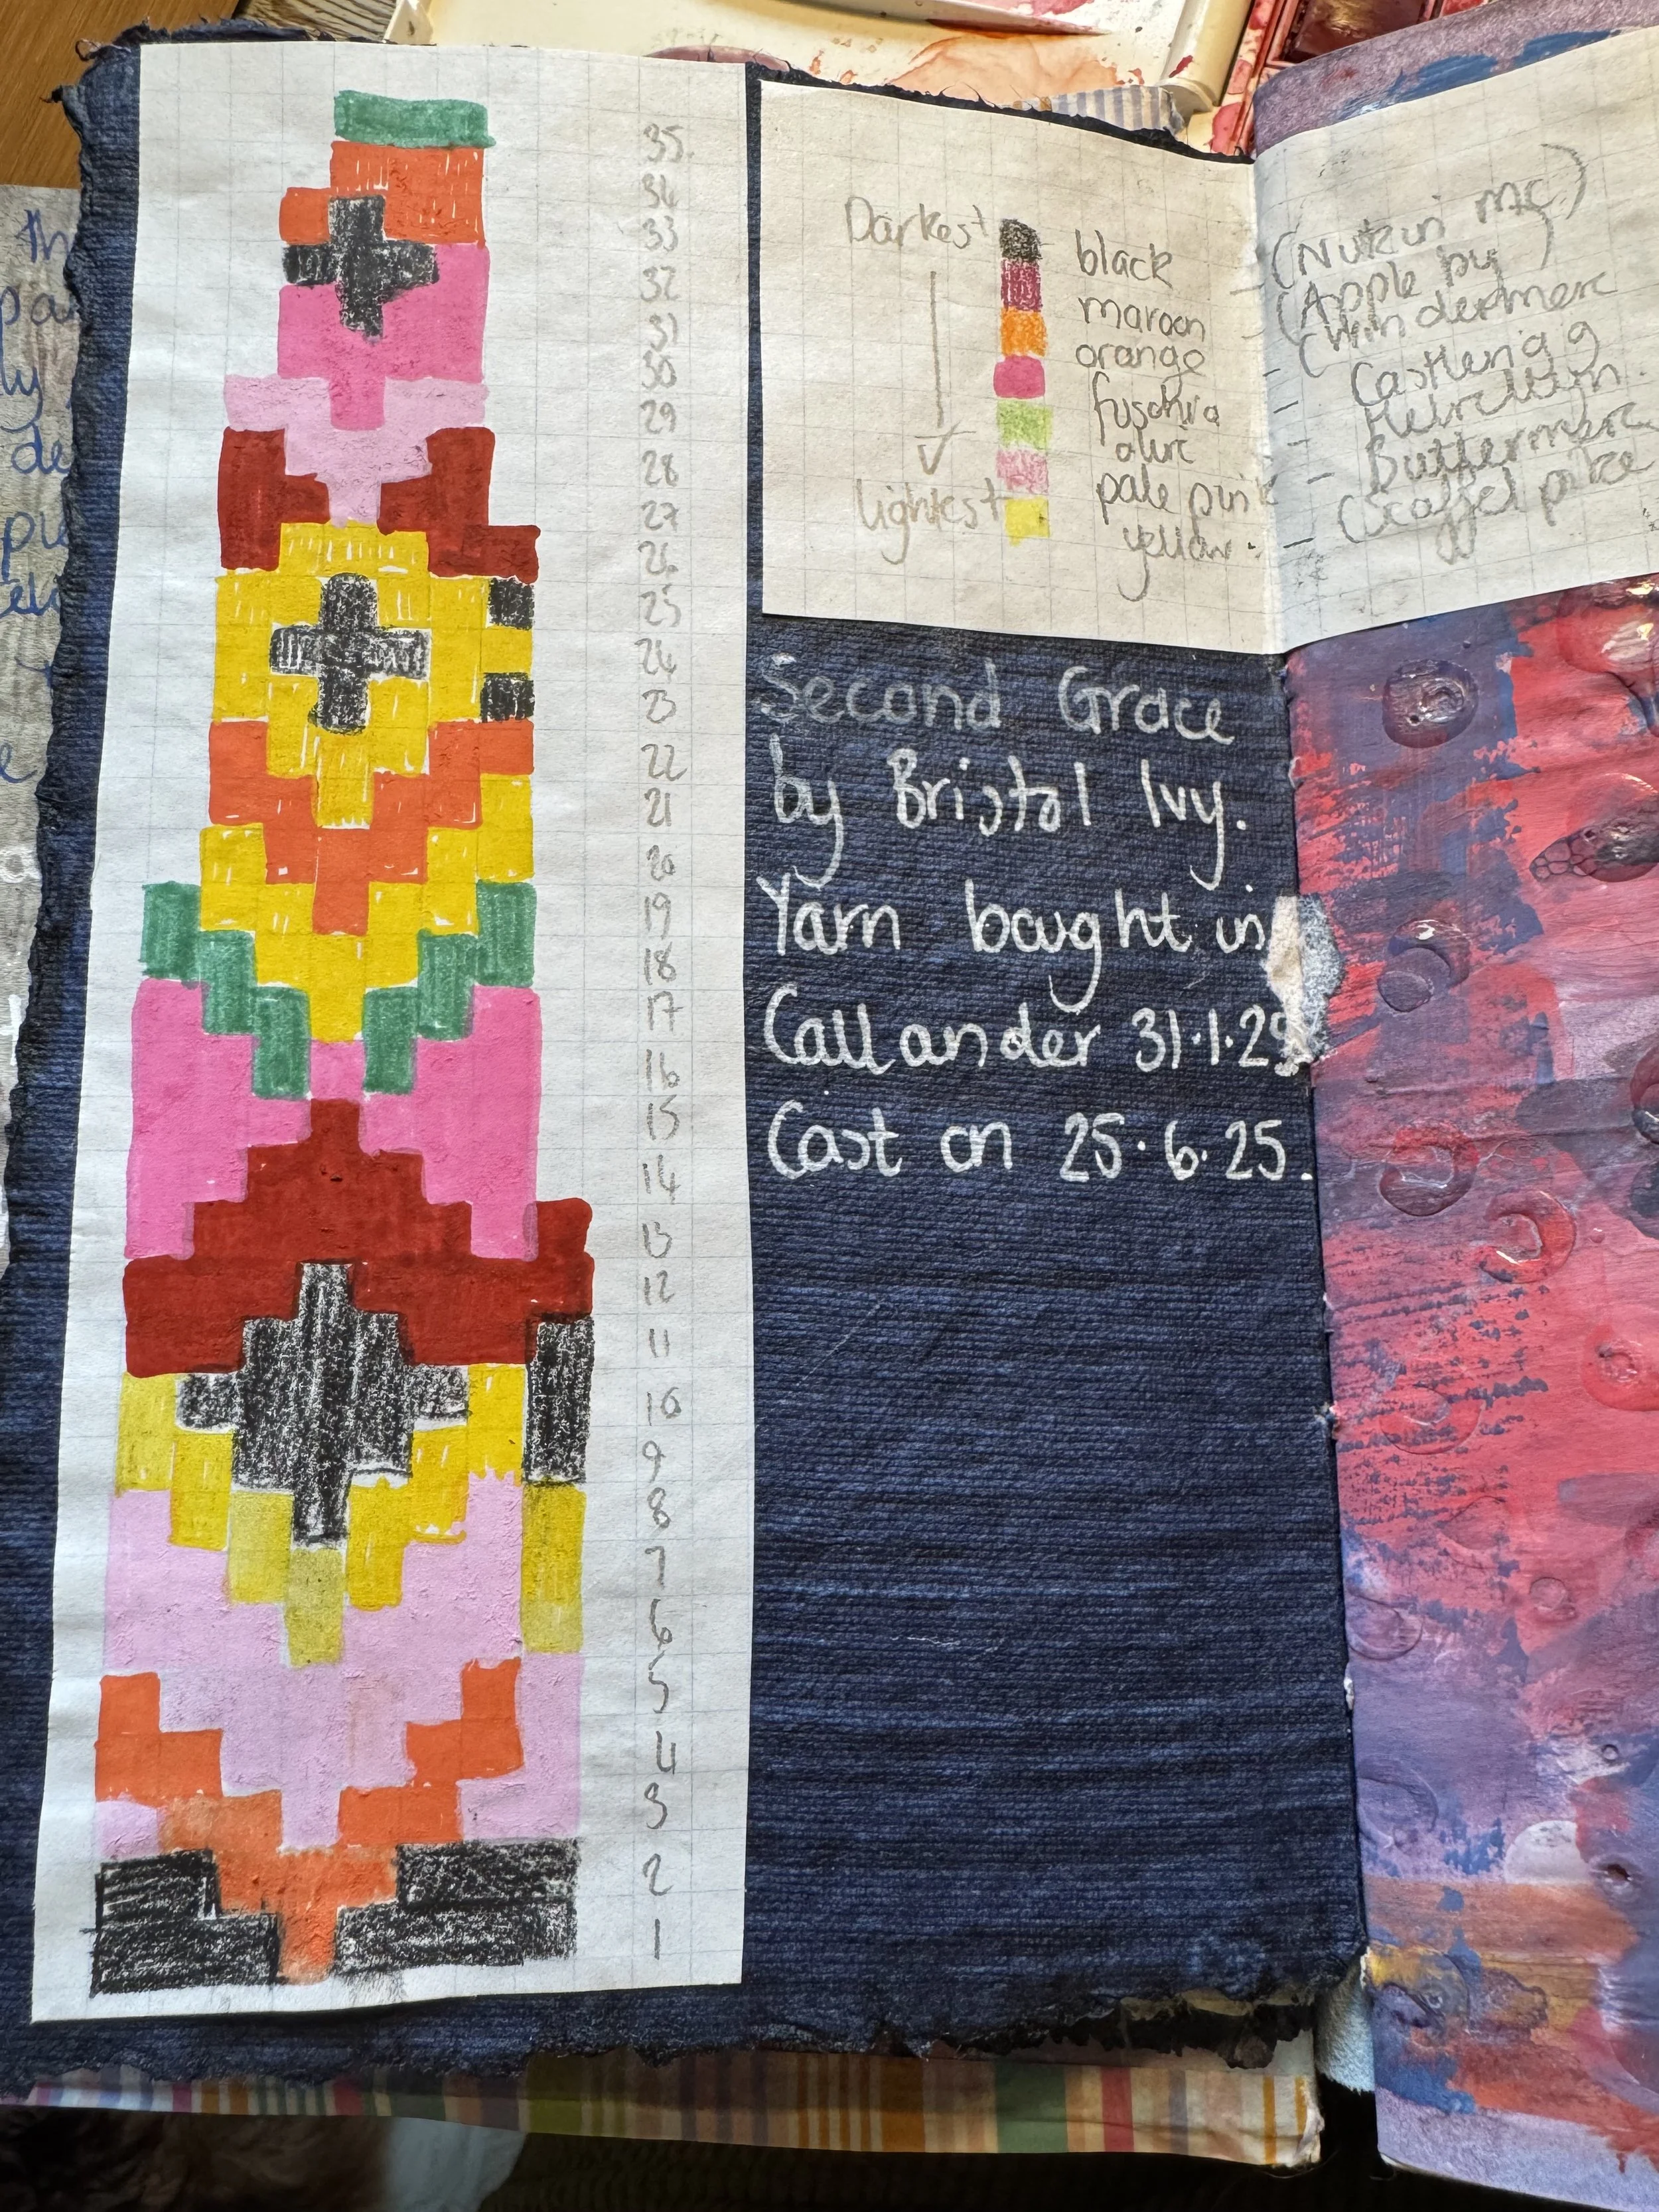


When I create my own colour palette, I like to draw out the colourwork pattern on squared paper and colour it in with my colours to help keep me right. It can be really tricky to remember which of the original yarns in the pattern your own choices represents, so this method helps me stay on track.
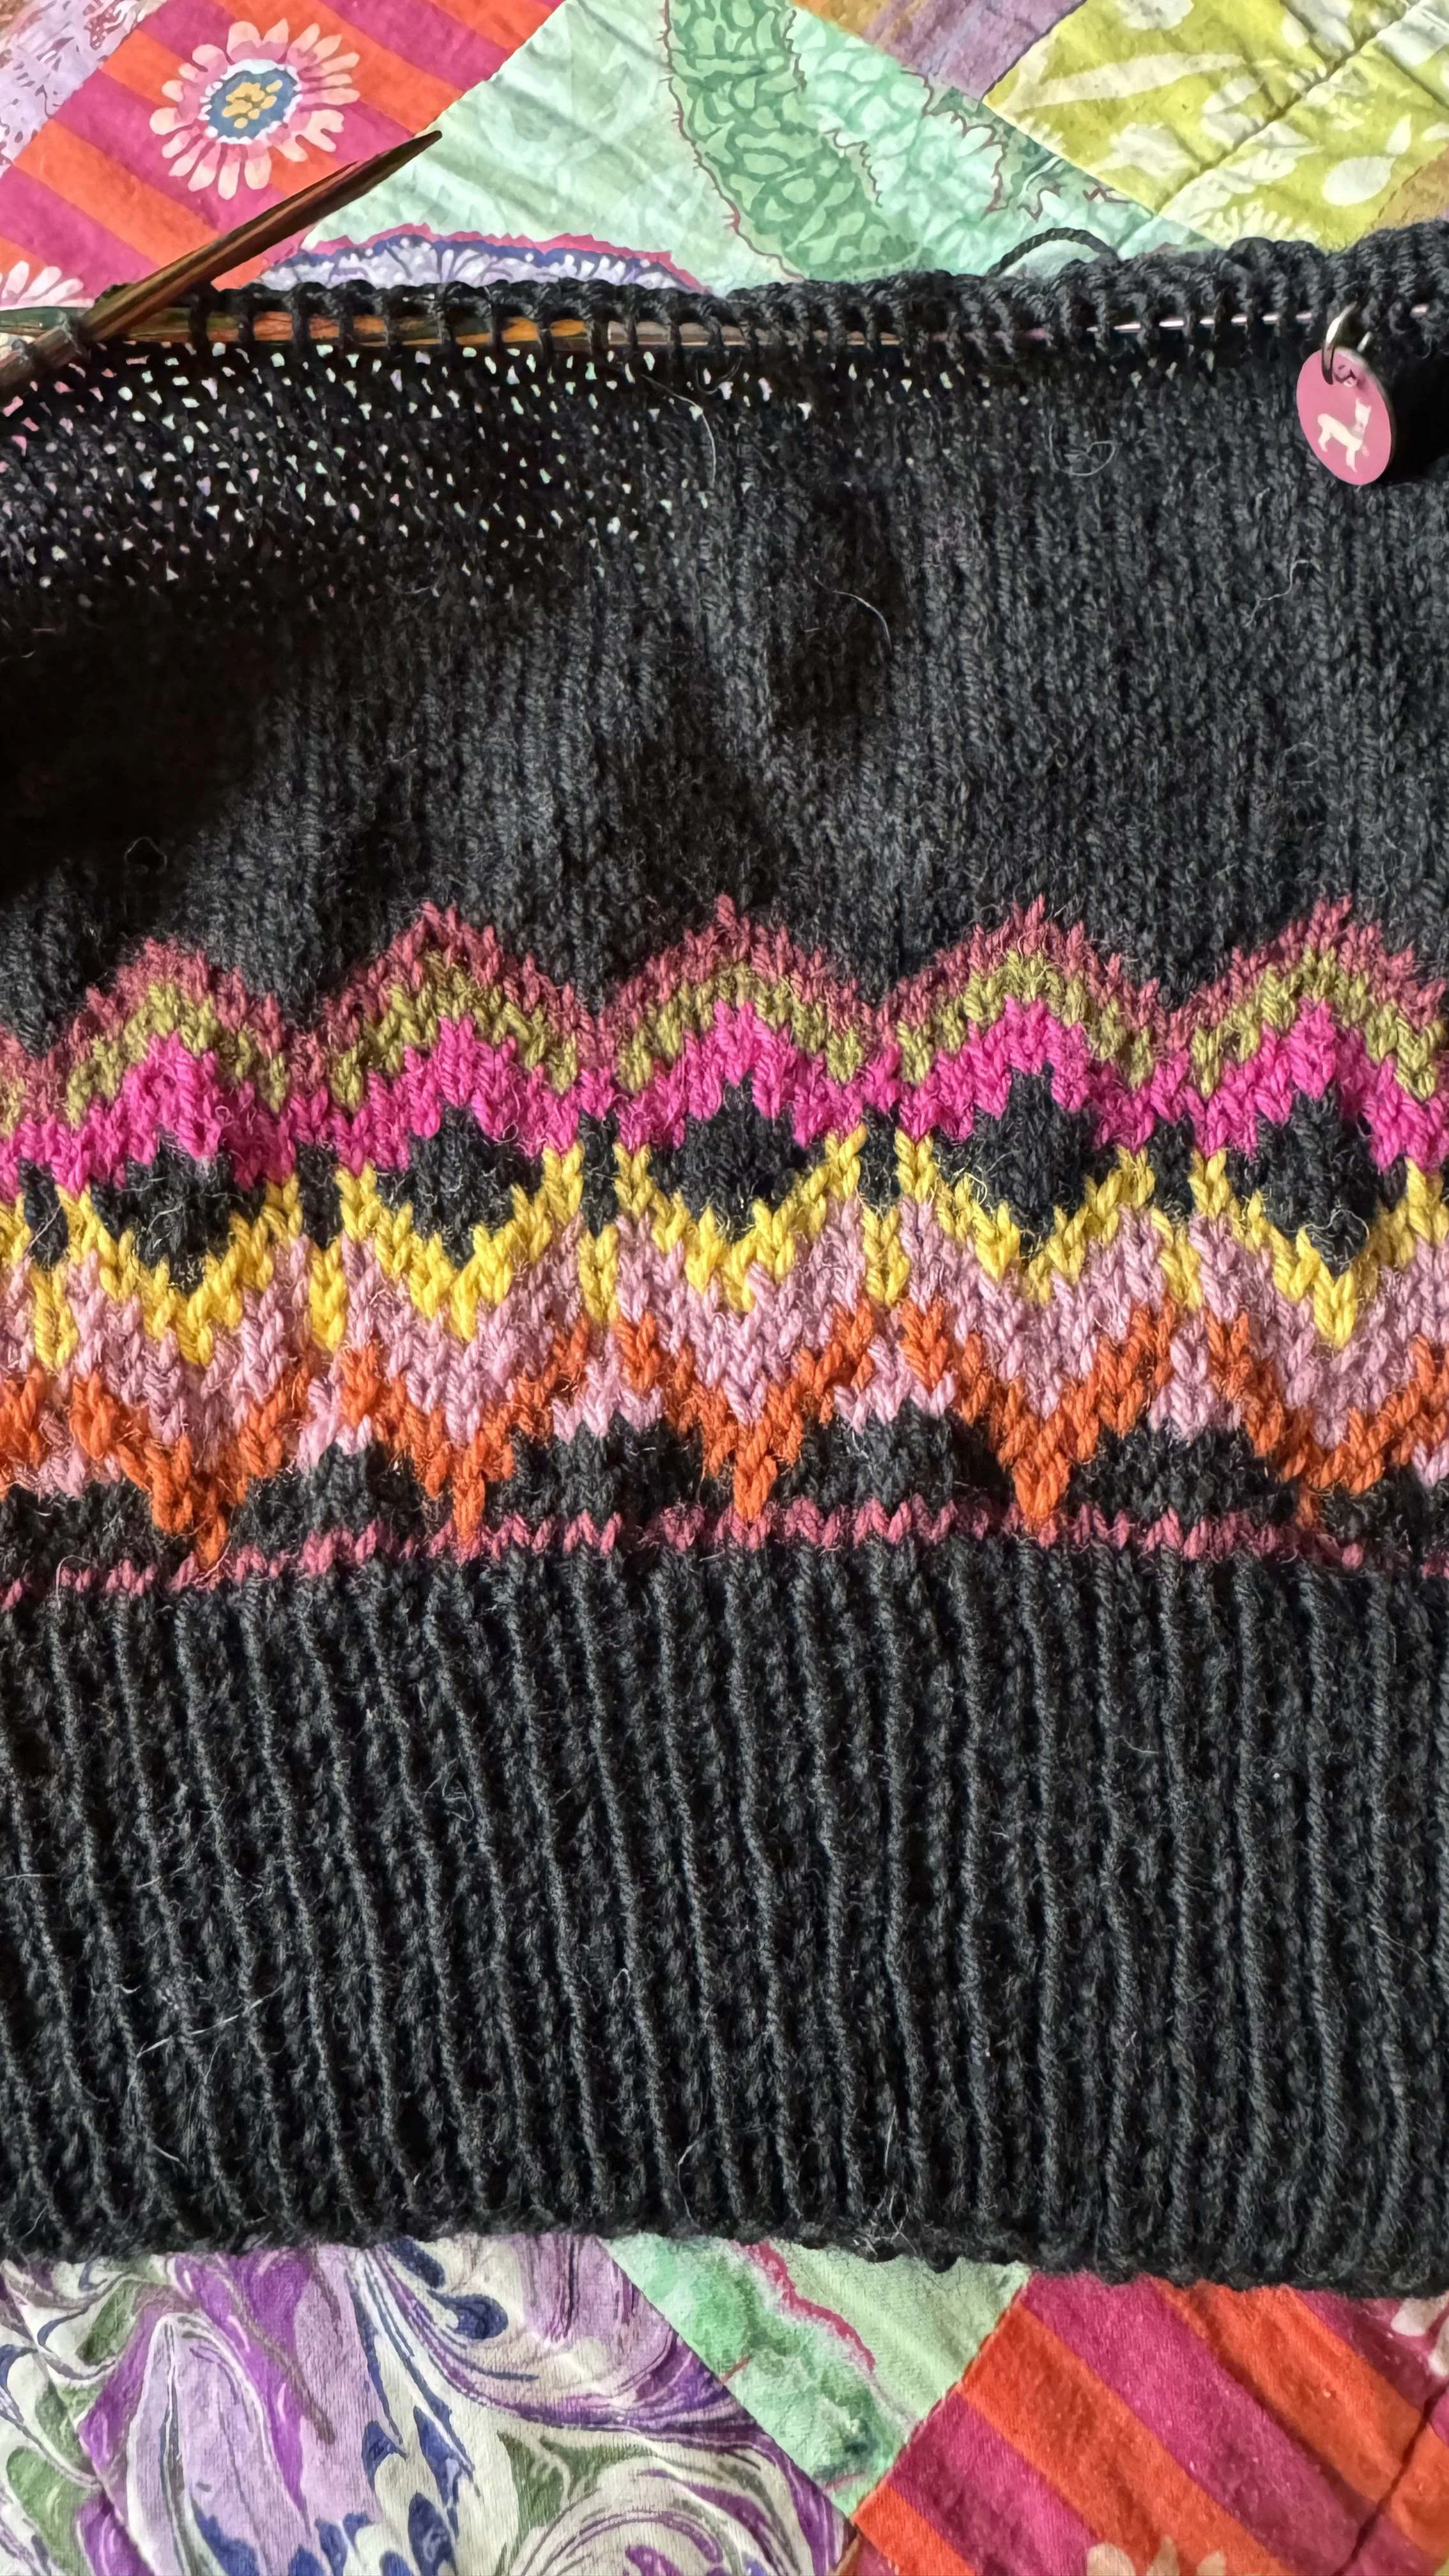
There are often boring bits in knitting, and this sweater was no exception. Unusually for me, this sweater was knit from the bottom up (colourwork yokes often start from the top down), which meant I had to endure the tedium of three inches of 1 x 1 rib! Fortunately, the colours kicked in straight after that, so things got interesting for a while. After that came the main body of the sweater, which was just plain black.
I absolutely loved the pattern at the hem, so I managed to power through the all-black section because I was desperate to make it to the yoke. The only fly in the ointment, though, was that with this being a bottom-up sweater, I also had to knit the sleeves and join them in before starting the yoke.
Escaping Sleeve Island: My Two-at-a-Time Strategy

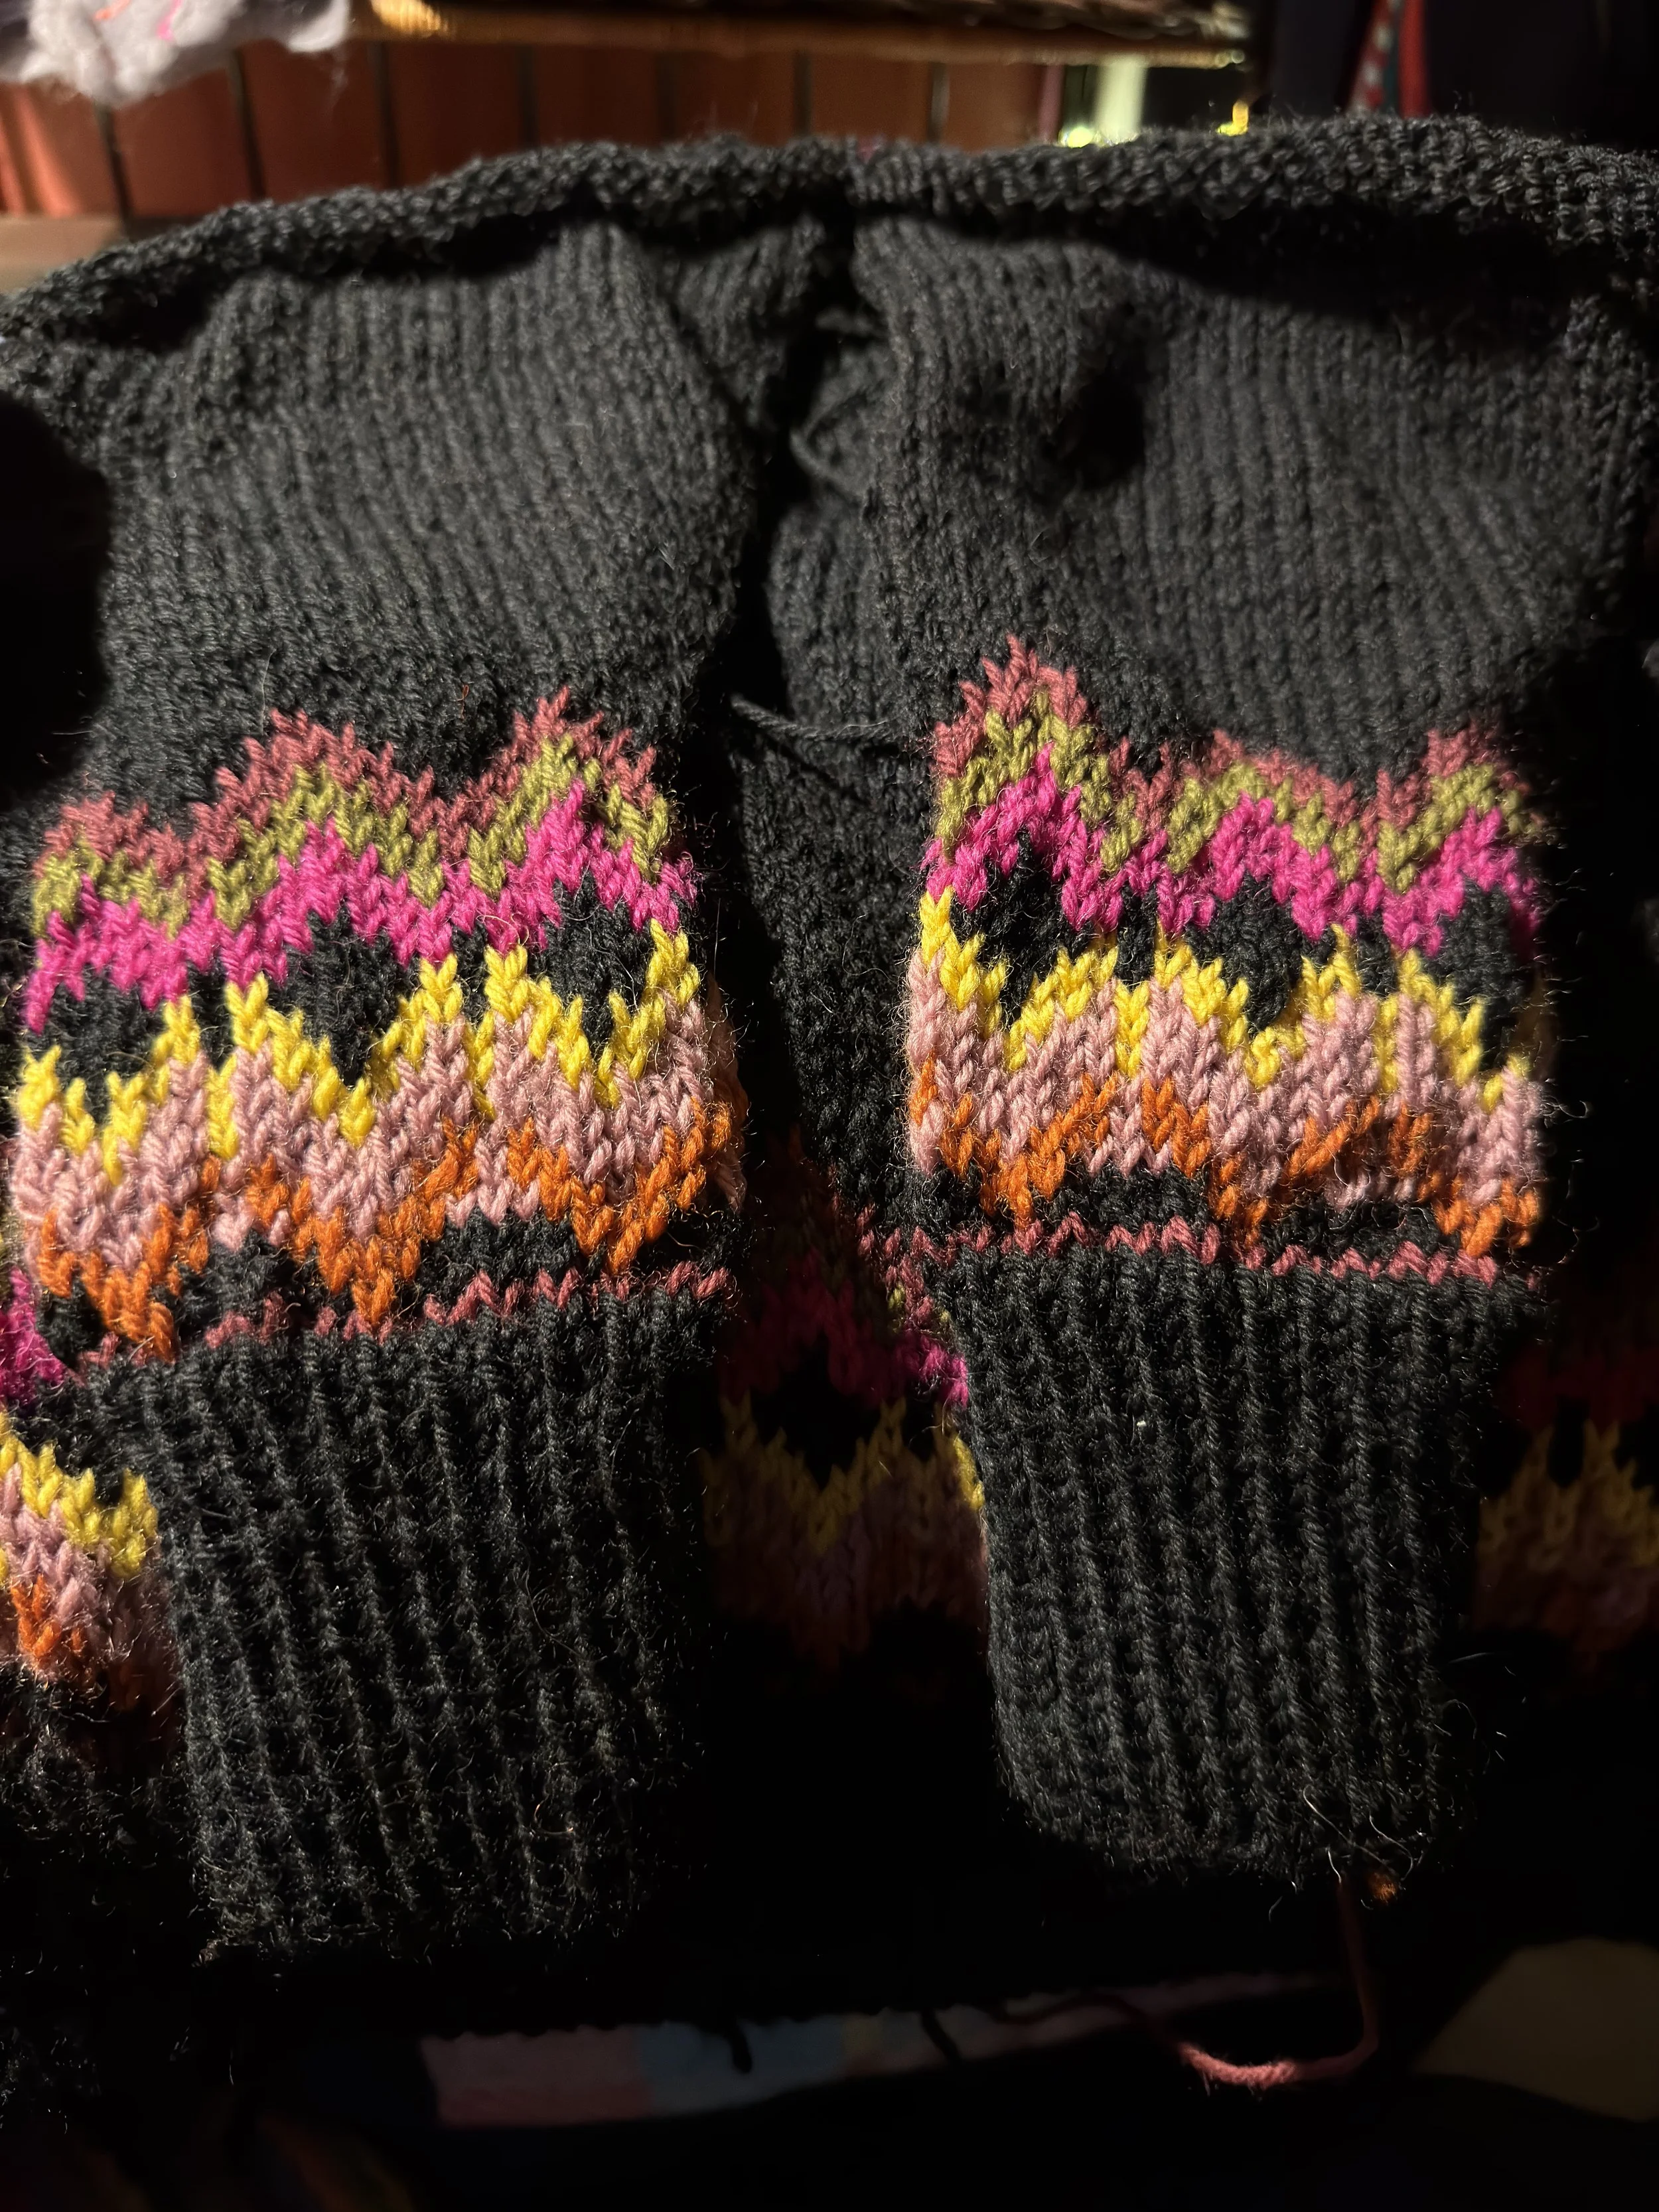
One of the main issues I had with finishing the Virginia Cardigan was what we knitters call ‘being stuck on sleeve island’. It’s that horrible feeling when you’ve knit half a sleeve, it feels like it’s taking forever, and you know you still have another sleeve to go! I did not want to get stranded there again so soon, so I decided to knit both sleeves at the same time. It’s a bit fiddly to get started when working in the round, but once you’re set up, it’s a brilliant way to save time and stress, and it ensures both of your sleeves are exactly as you want them to be. Because these sleeves would become part of the yoke, there was no shaping involved at the top, which makes this method ideal.
Once the sleeves and the body were joined together, I knew it would take no time at all to finish the yoke. The colourwork is exciting, and you start reducing stitches every few rounds, so it literally flies off the needles. In no time at all, I was nearly done, but some things just didn’t feel right.
Never Settle: Fixing the Collar and Cuffs
I’ve learned over the years that there is no point settling for anything that feels ‘off’ - this applies in all aspects of life, not just knitting!
The collar called for a stretchy bind-off, but when I did it, I ended up an off-the-shoulder number! That’s not really what you want from a cosy Aran weight sweater. I undid the cast-off stitches and re-knit it with a conventional bind off, which tightened it up perfectly, leaving plenty of space for my head to get in and out comfortably.
The other thing that was bugging me was the cuffs (I posted bout these dilemmas over on Instagram). I knew this sweater couldn’t become a much-loved and well-worn part of my wardrobe unless I fixed them. It was the result of a mistake I had made when moving from the rib of the cuff on to the pattern.


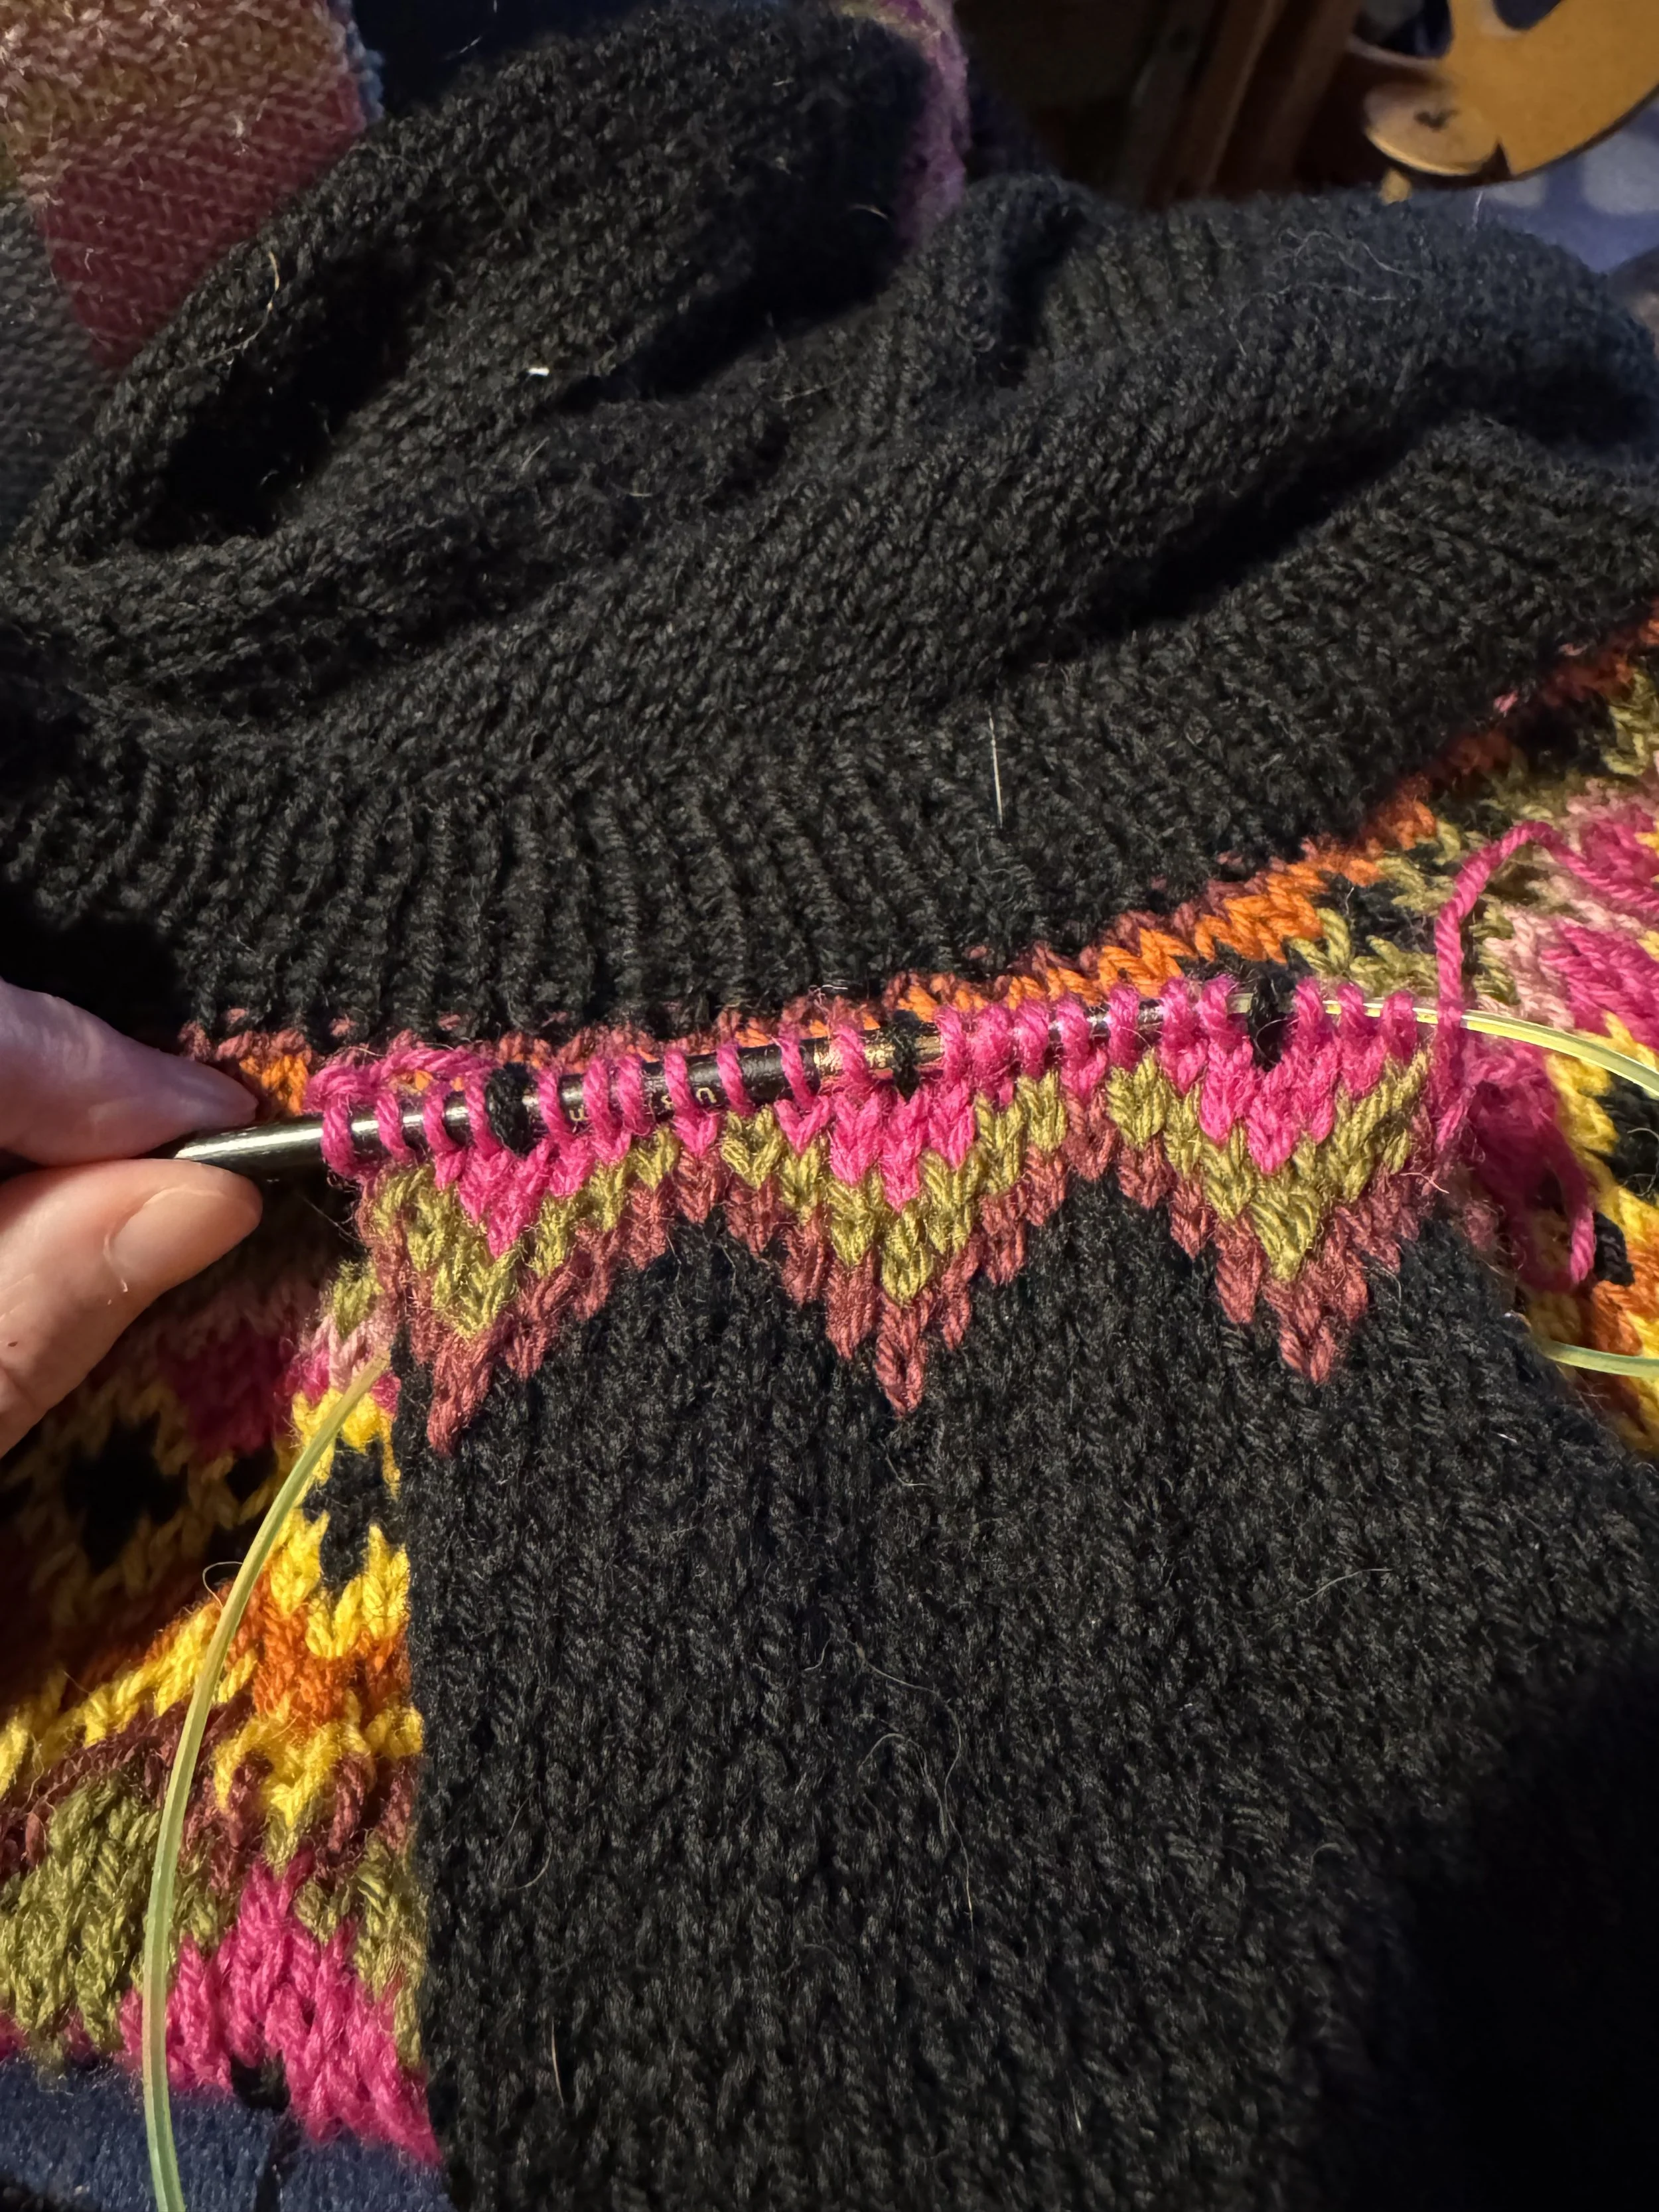
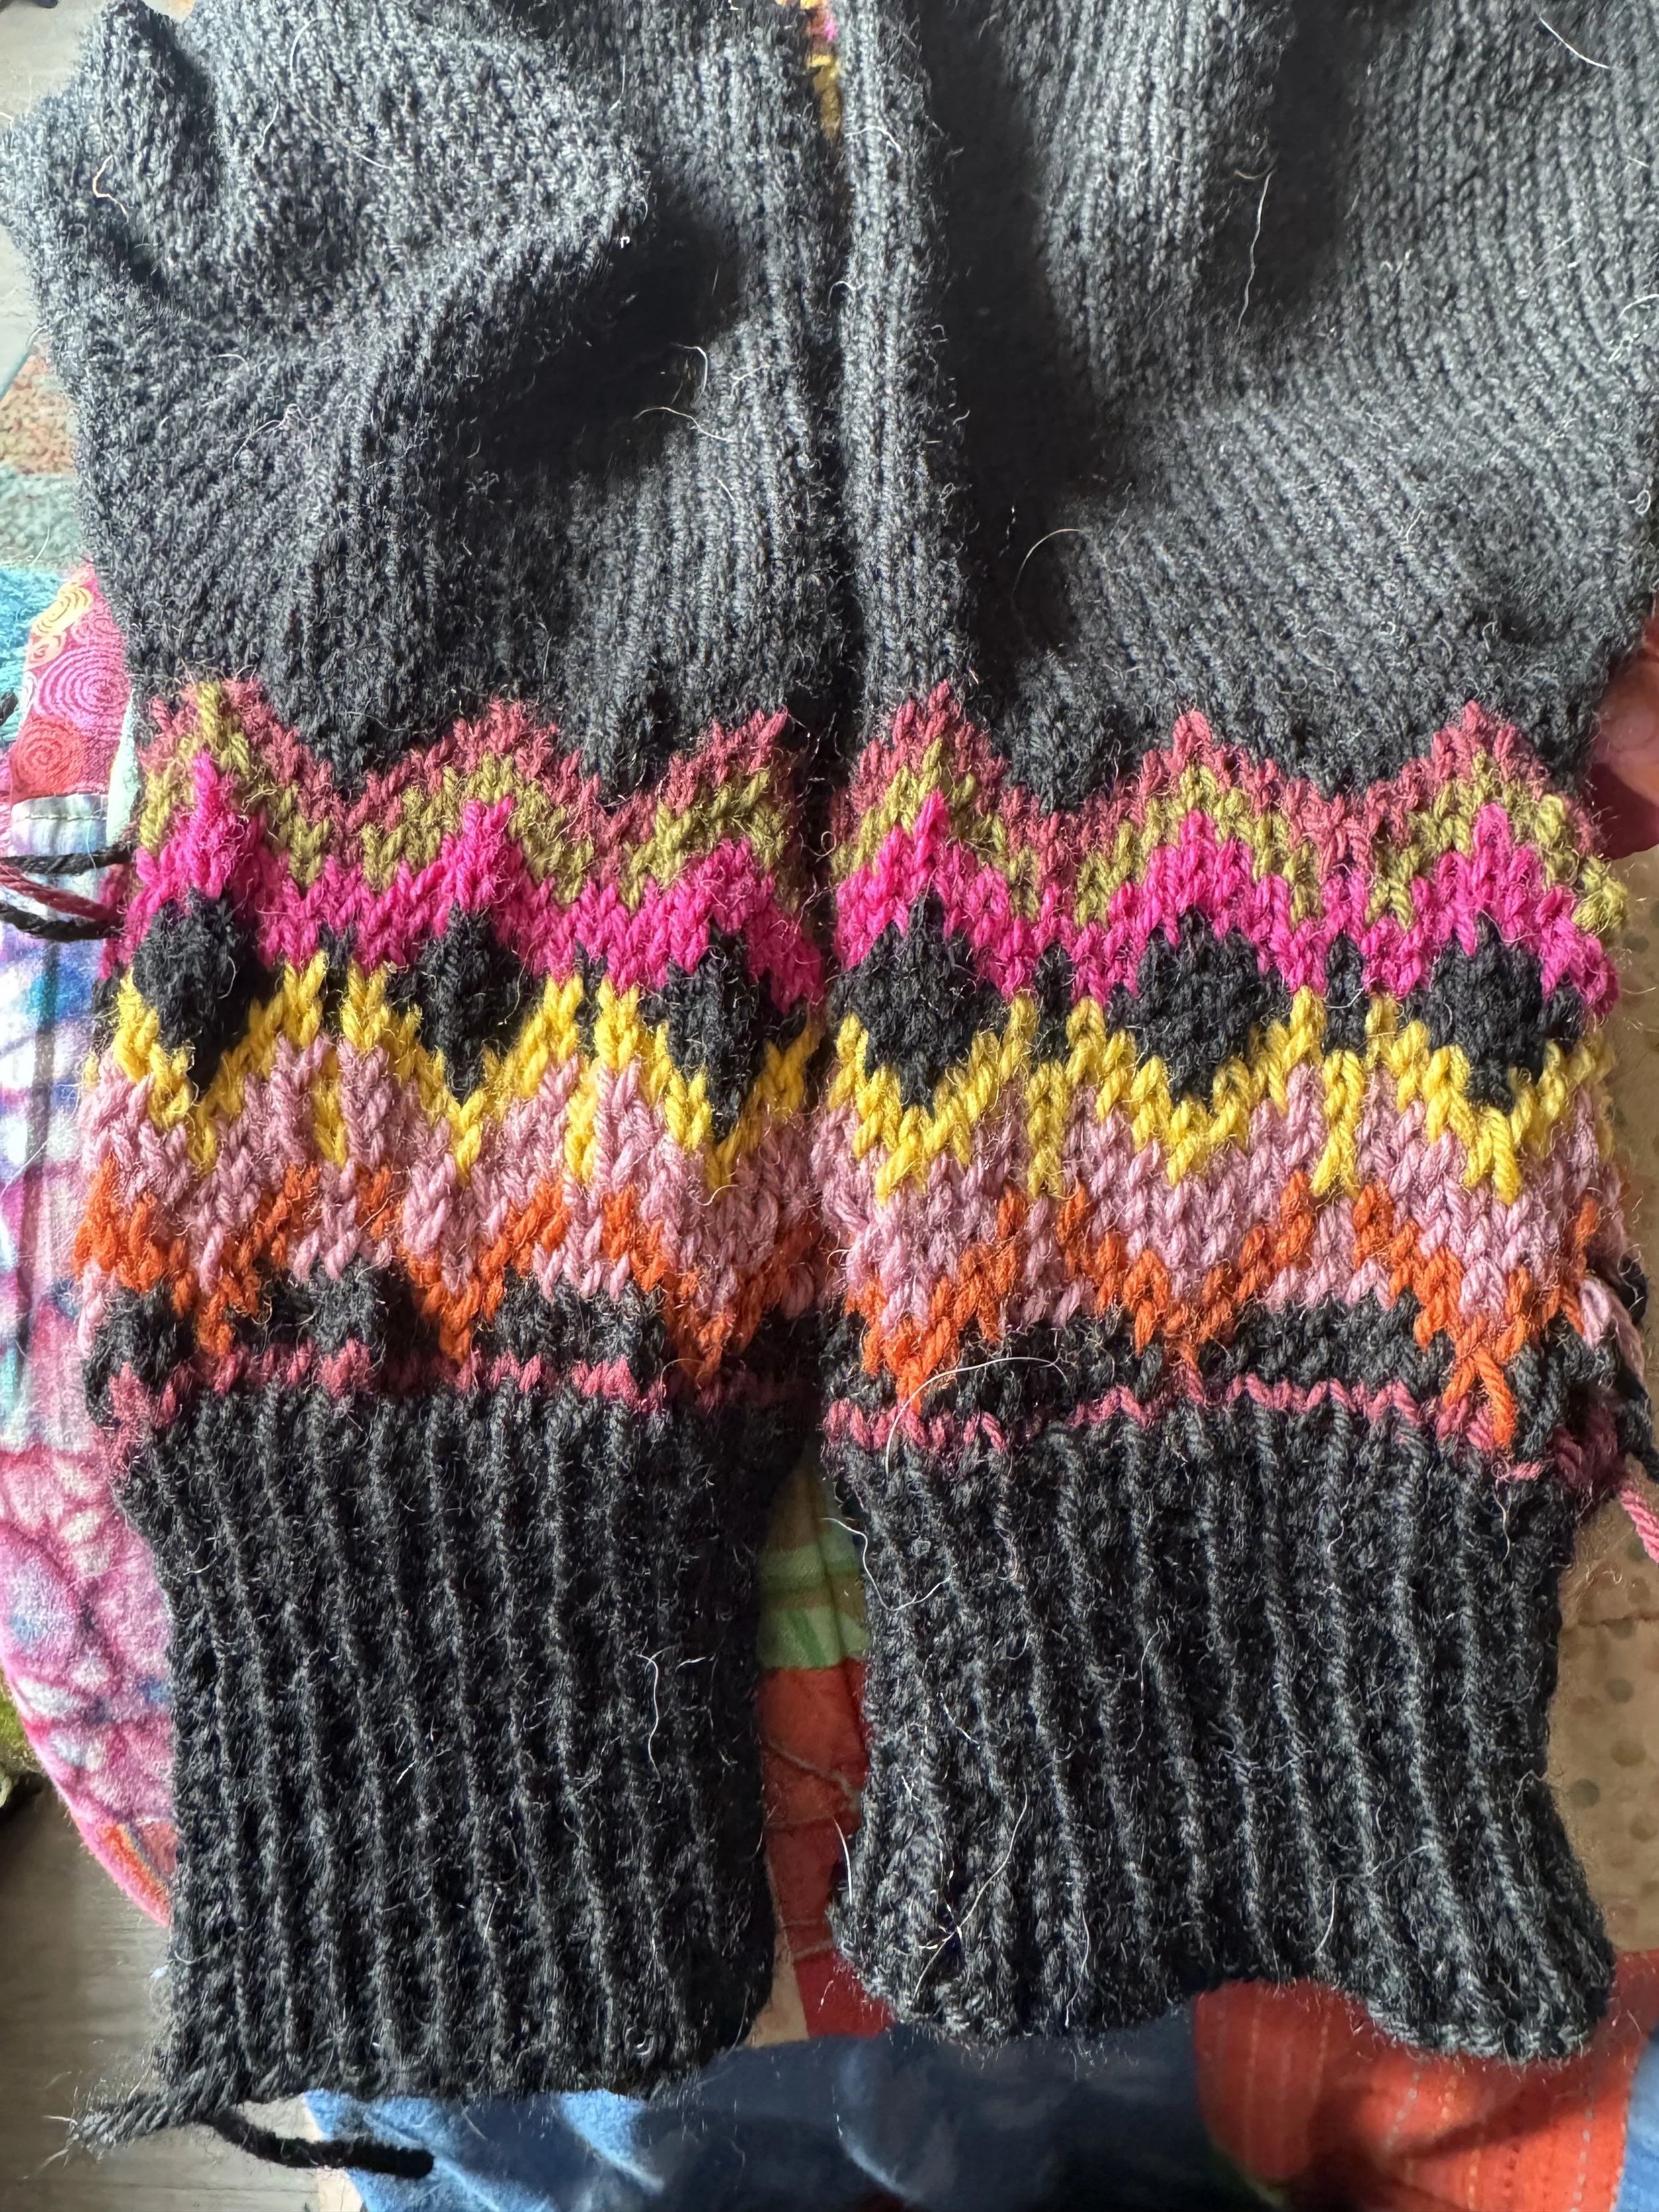
This sweater used three sizes of needles; the smallest for the rib, the next size for the plain knitting, and a larger size for the colourwork. The larger size is helpful because it’s really easy for the tension to get tighter when knitting stranded colourwork. I had inadvertently gone from the ribbing needle to the plain knitting needle, which made this part of the cuffs too tight, preventing me from pushing the sleeves up at all. I removed the offending section and picked up the stitches so that I could re-knit the cuffs with the correct needles. This worked like a treat and rectified the problem.
The only other anxious moment I had was when I blocked the finished sweater. Blocking your knitting really helps the stitches to relax, especially in stranded colourwork, but I was worried that the whole thing was stretching out and becoming massive! As it lay flat to dry, I just had to wait to see how it would fit. Thankfully, all was well. The body had relaxed a bit, but not enough to put me off. I absolutely love it, and love these crisp autumn days when it’s the perfect thing to wear!
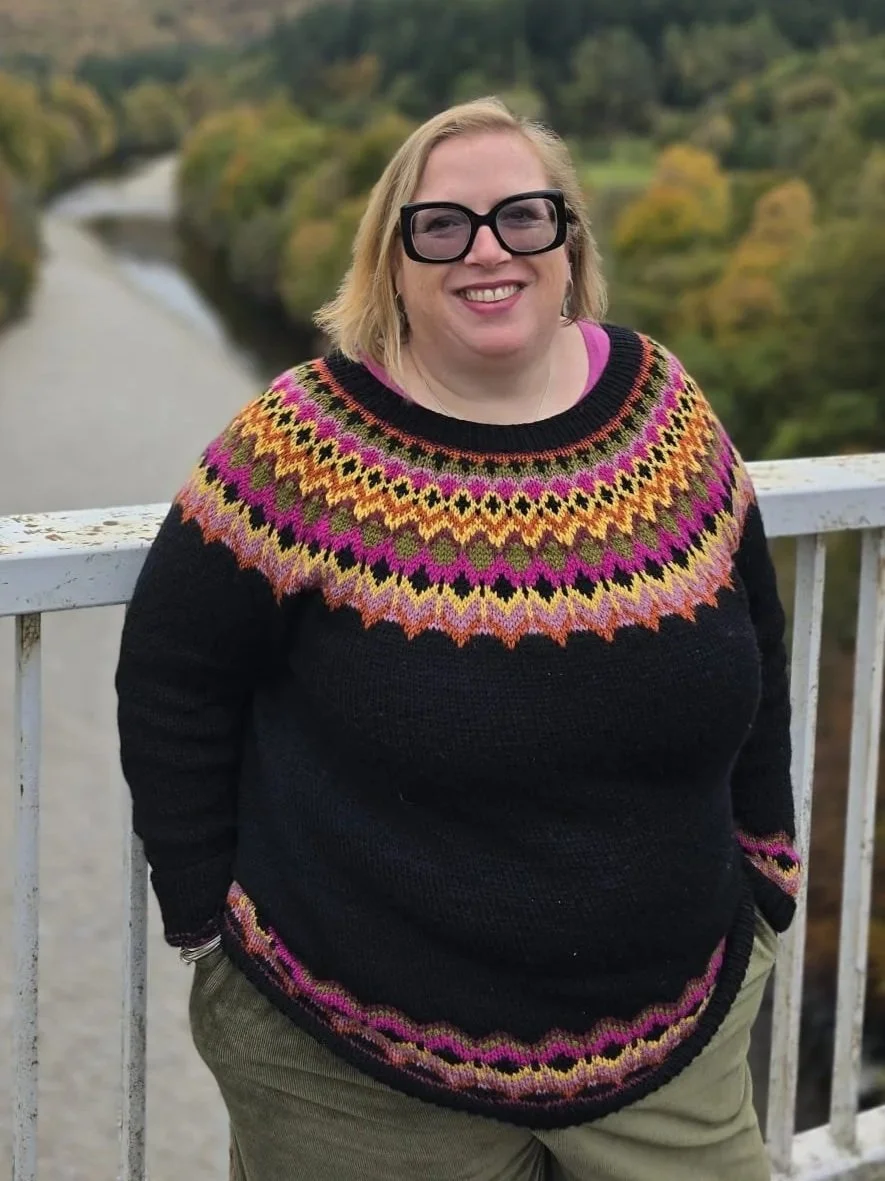
New sweater in the wild - note how the green matches my trousers perfectly!